Dear reader: This article contains links to products and services that I may be compensated for, at no extra cost to you.
The classic 4-Day Inca Trail to Machu Picchu is one of the world’s great hikes. It is the same route that the ancient Inca rulers used for reaching the sacred Citadel and New World Wonder. Along the way, there are half a dozen other major ruins, plus countless more smaller ones.
Today, the 4-day trail is the only way that you can actually hike to Machu Picchu without taking a bus. The 2-day, 5-day, and Salcantay/Lares alternatives all involve spending a night in Aguas Calientes (the tourist town below Machu Picchu), then taking a bus the MP the next morning. Only those walking the 4-day trail get to watch the sunrise from the Sun Gate and arrive at Machu Picchu on foot from above first thing in the morning.
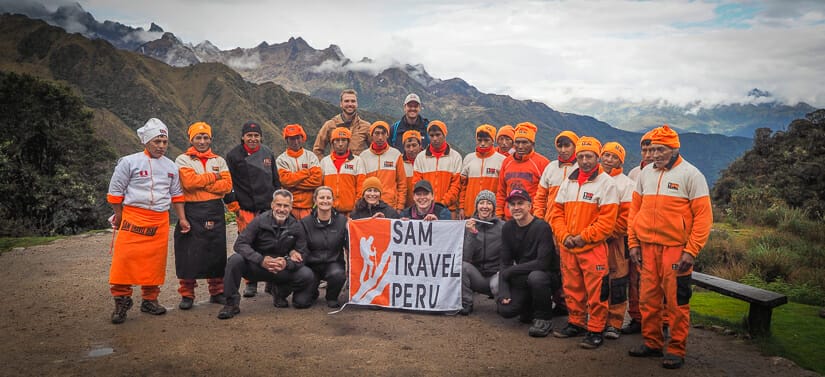
If you are a detail-oriented trip planner like I am, then this article is for you. Below, I am going to introduce each day of the Inca 4-day trail, step-by-step, with tons of photos (spoiler alert!) I did my trek with Sam Travel Peru and their guide David, both which I highly recommend. Although I did my trek in May, the first month of the “dry” season, we got a lot of rain on our hike.
To read about everything I did BEFORE the trek, see my separate guide to preparing for the Inca Trail.
I’ve also got guides to Pisac and its ruins, Ollantaytambo and its ruins, and Cusco and its ruins.
Table of Contents
Day 0: The Briefing
One day before we started the trek, our group of eight trekkers had a briefing with the guide at the Sam Travel Peru office in Cusco. I was the only member who didn’t join the briefing, because I was going to meet them in Ollantaytambo, their breakfast stop on the way to the start of the trek.
In fact, I highly recommend staying in Ollantaytambo before you do the Inca Trail. It’s so much more fun to work your way up the Sacred Valley, seeing the Ollantaytambo ruins (the second most important after Machu Picchu) first! Save Cusco for the end of your trip – it is the biggest, noisiest, and also highest place in terms of elevation.
Anyways, because I wasn’t able to join the briefing, our guide, David, gave me a briefing over the phone at 6 PM on the evening before our trek. The briefing is whn you can ask any last-minute questions you might have.
The only surprise I got during the briefing was that the group had supposedly decided how much we would each be tipping the porters and chefs. I would find out later from the group members that they were told this amount – they didn’t decide on it.
I also asked David what a normal tip for the guide (him) was, and the figure he quoted me was ridiculously high. I realize that it’s weird to ask someone directly how much to tip them, but I really struggled to find any kind of clear information about how much to tip on the Inca Trail, so I thought I would just cut to the chase and ask him directly.
Overall, I found this tipping issue to be the most awkward part of the Inca Trail hike. We had to decide as a group how much to tip the guide, and there was some disagreement in the group about how much was appropriate. I also didn’t like how we were told how much to tip for the porters. When we gave the tips at the end of Day 3, it came with an awkward ceremony.
I wish the tips were either set, so you can know how much money to prepare beforehand and include it in your budget, OR they were totally personal, so each person can actually decide on their own.
If the company wants to make a set tip amount for the porters/chefs, then this should be indicated on their page or in simply included in their base rate. Then it wouldn’t have to become this awkward and surprising issue that each participant has to navigate.
Having said all that, this was the only issue I had about the trip. Everything else about it, from pre-trip communication and payment to the equipment, guides, and tour itself was absolutely perfect. That’s why I still highly recommend Sam Travel Peru for your Inca Trail 4-day trek. You can read about how I chose this company and what I liked about them in my guide to preparing for the trek.
Day 1: “The Easy Day”
In Sam Travel’s Inca Trail 4-day itinerary, they start Day 1 earlier so that they can get to a better campground on the first day. By walking a little further on Day 1 than other trekking groups, it also better prepared us to handle our really big Day 2.
The other group members and guide set off from Cusco at 4:30 AM. I met them at 6:30 AM at a breakfast shop in Ollantaytambo, where I had been staying for four days. It was a nice surprise to find out that the meal was covered by Sam Travel, even though I had been told before that I would have to pay for it.
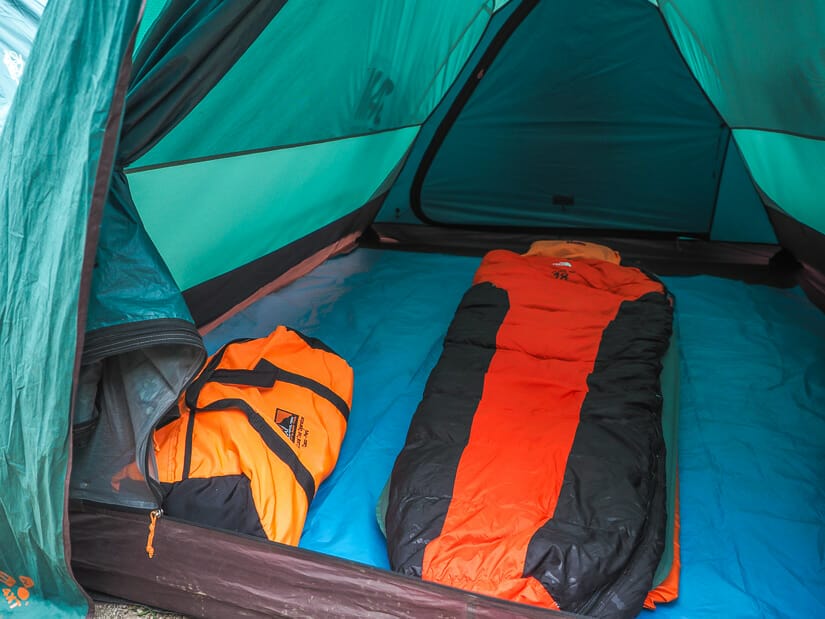
We sat around at breakfast a little longer than I would have liked to. I was eager to get going, but there must have been a reason. This is also where I had a chance to put my overnight items for the trek in my duffel bag for the porter to carry. I also handed off my excess luggage to Sam Travel, all the things I didn’t need for the trek, to be picked up in Cusco after the hike. It’s important to only bring the essentials, because you have a 5 kilogram limit in your duffel bag, plus no large luggage is allowed on the train from Machu Picchu back to Ollantaytambo/Cusco.
It was nice to meet my trekking mates here, who were all a little sleepy after their super early start in Cusco (another reason to start in Ollantaytambo!) I was very lucky to be placed with a really cool group of people, and we would become close over the following four days.
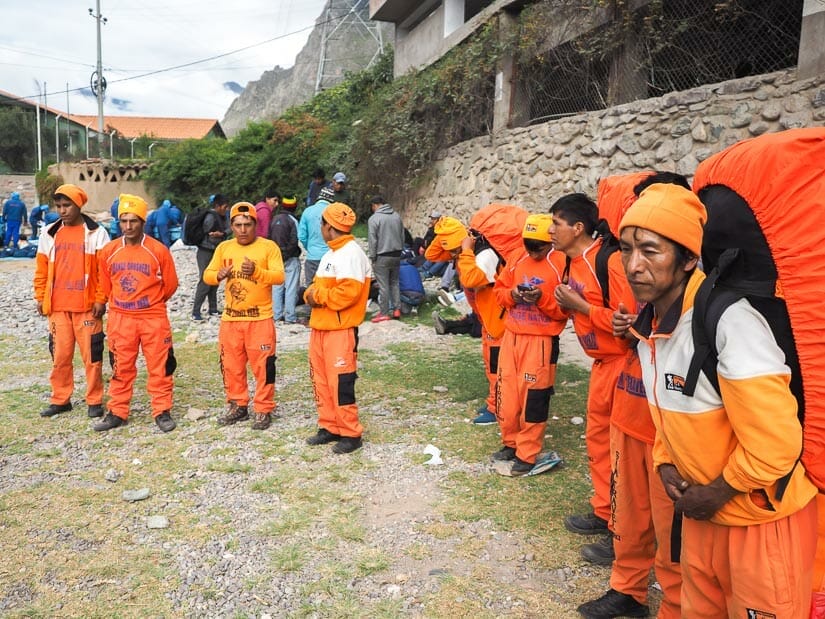
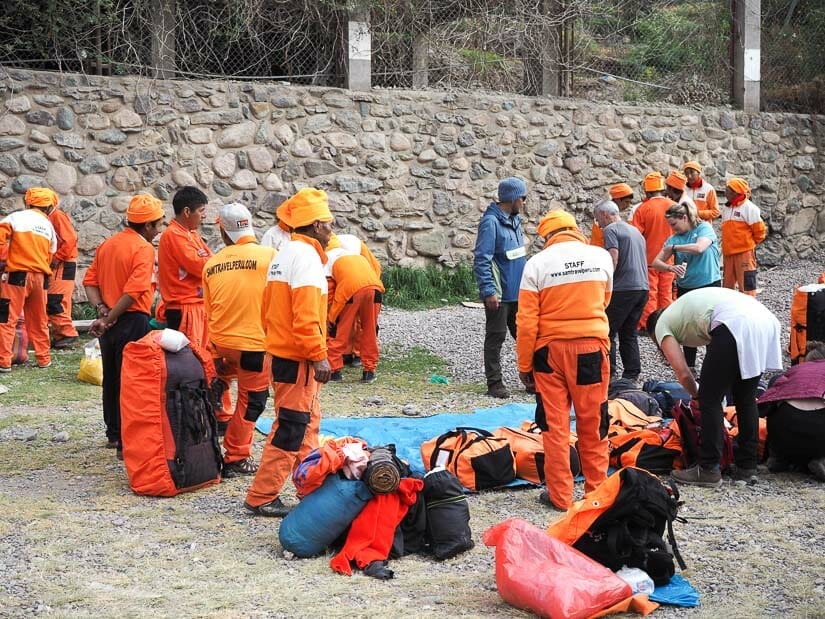
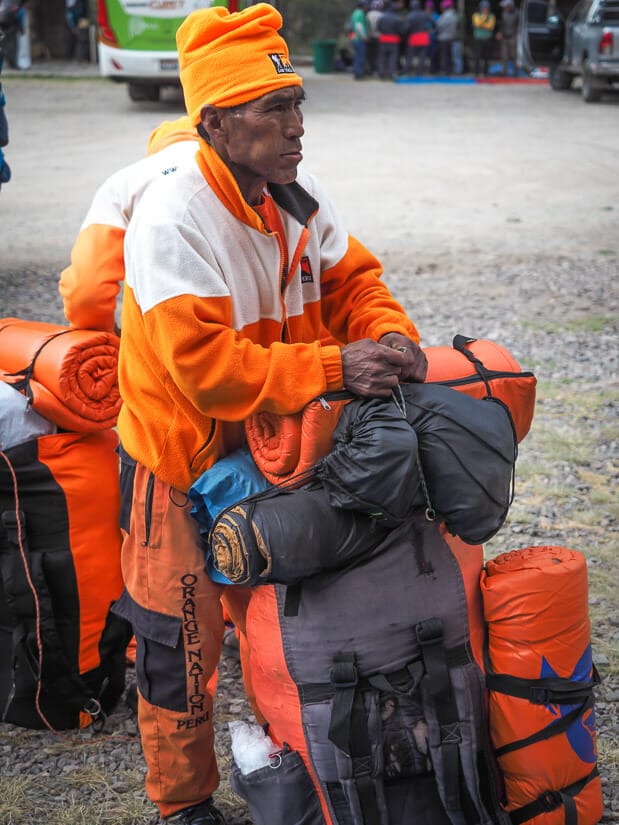
From Ollantaytambo, it was a 45-minute drive to the Inca Trail trailhead, which is also called Piscacucho or KM 82. It is marked “Inca Trail Camino Inca” on GoogleMaps. We arrived at a large parking lot, where other trekking groups were also preparing. This is where I first saw and learned about the various colors (and nicknames) or each trekking company. We were the “Orange Crushers”. Other groups were in green, purple, yellow (the Minions), etc.
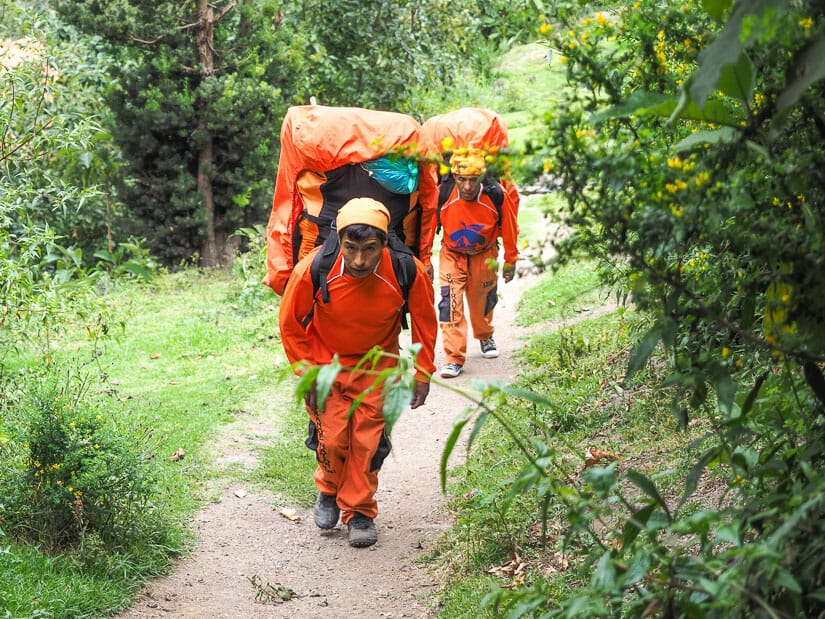
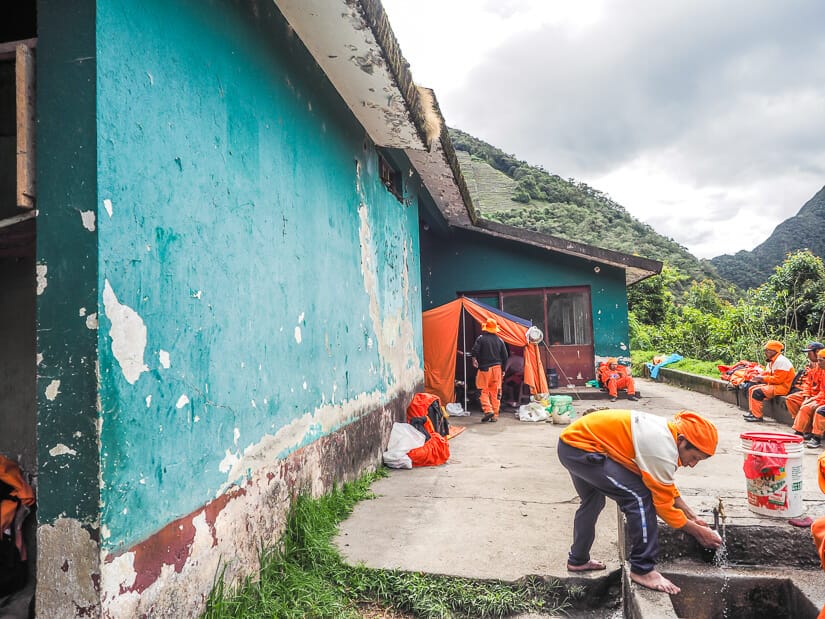
We spent around 30 minutes here with a chance to use the restrooms (always paid in Peru, usually 1 sol), make last-minute packing changes, put on sunscreen, prepare trekking poles, and so on. This is also where we first met our surprisingly large crew of porters (we had a staff of 18 for our group of 8).
At this point, I was SUPER eager to start hiking, but we couldn’t quite yet. We still had to check in and show our passports/tickets – the trekking company will be holding your ticket, but don’t forget your passport! And there is no Machu Picchu stamp here – if you really want one you can get it at the Machu Picchu ticket office in Aguas Calientes, but I don’t recommend putting this stamp in your passport.
The was a bit of a rush, with all the trekking companies lining up at the same time (I guess the time that the office first opens?) But kudos to Sam Travel for getting us into that line first!
After that, David gave us a tour of the small and very basic museum on site. It’s really nothing special. It introduces some of the plants, animals, and history of the Inca Trail, and the Andean Milk Way (normally clearly visible on the Inca Trail, but we wouldn’t be seeing any stars due to the clouds/rain). I found this stop unnecessary, but it seems like every group does it.
It was here that we first learned how knowledgeable David is on all these topics, but also just how long he can talk for. If you are someone who enjoys highly detailed explanations, you will love this guide. It might just be me, though – I never, ever take tours when I travel, unless it is required (like on the Machu Picchu). I’m a fiercely independent traveler and usually research/read all about a place before I visit. Often this is because I’ll be writing an article of my own about the place after.
A lot of what David talked about for the following four days I had already read about before the trip, but I also learned a lot of new tidbits from him too. I guess I’m just not used to sitting and listening for so long – I’m usually all over the place taking pictures and exploring sights on my own when I hike or travel. To be fair, this isn’t really a complaint about Sam Travel or David specifically, because every other guide from other trekking companies we saw on the trail and at Machu Picchu seemed to do exactly the same thing.
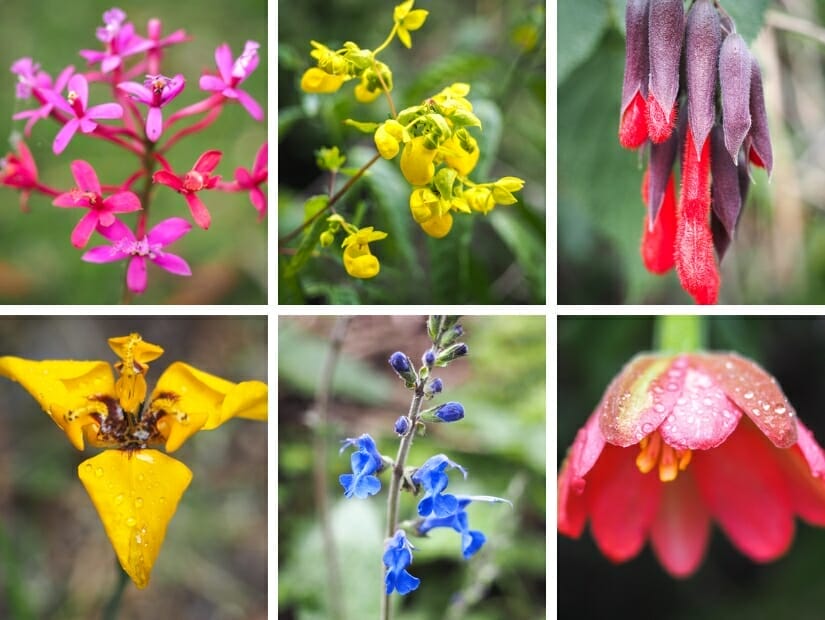
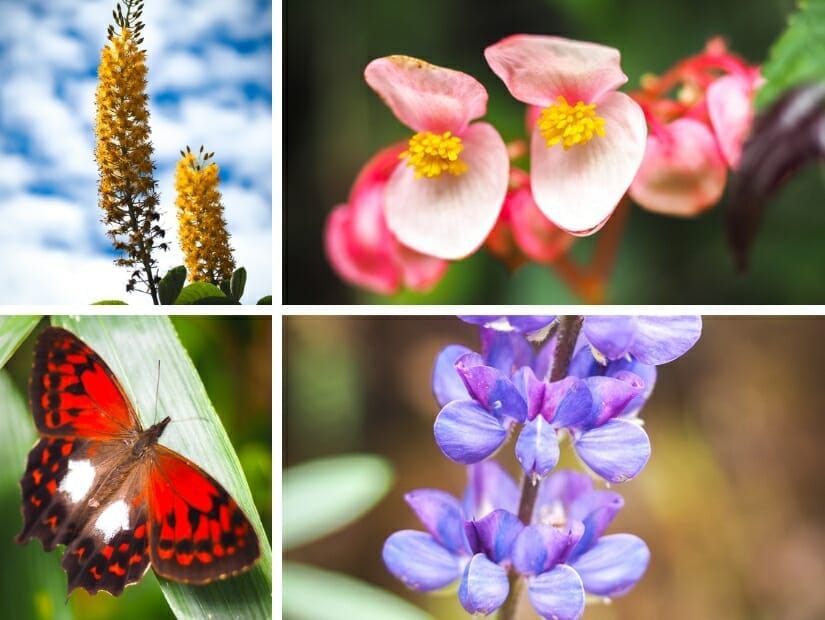
Anyways, outside the small museum, we saw the small orchid which lends its name to Wiñay Wayna, or “forever young”, the most important Inca Trail ruins besides Machu Picchu. You’ll see a photo I took of it further below. This was the first of many flowers and other plants that we stopped at to hear an extended talk about.
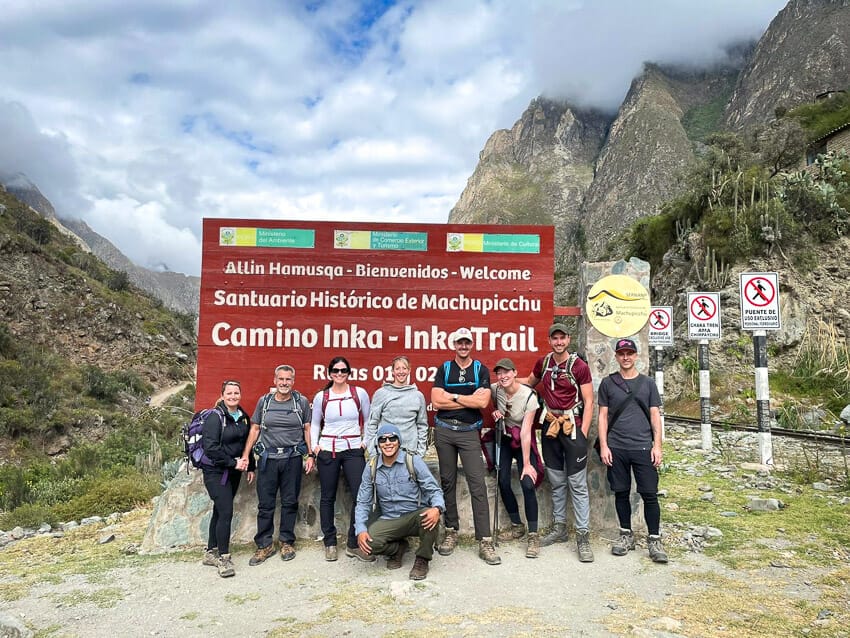
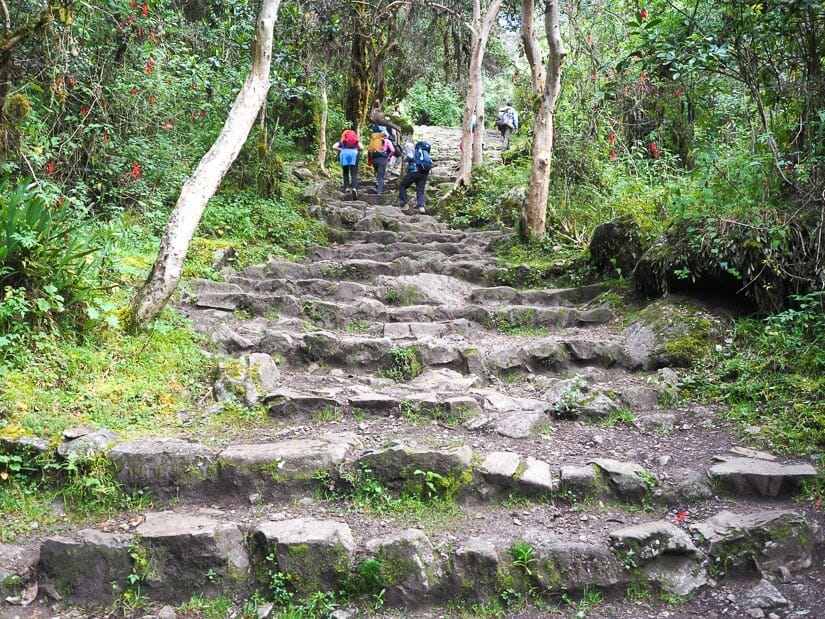
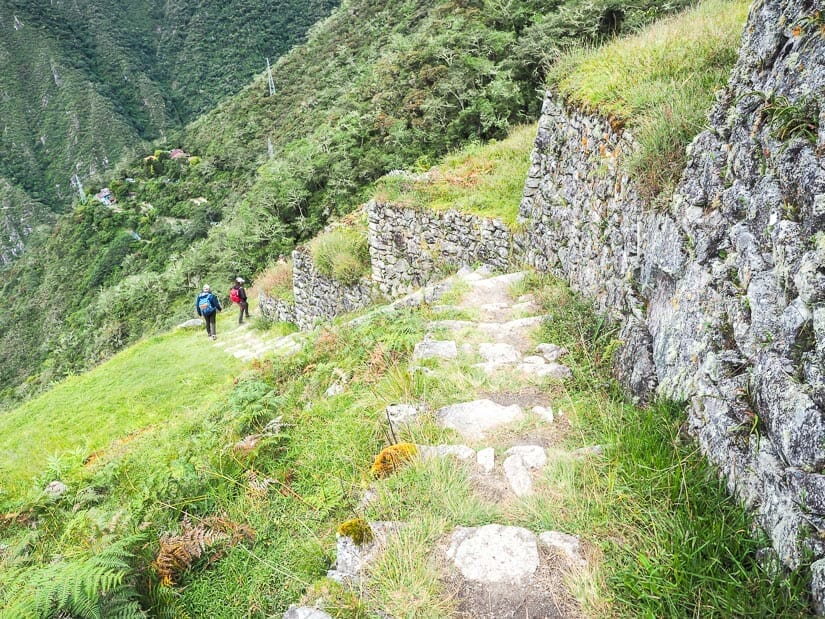
I had an extra skip in my step as we finally made our way down to the actual start of the trail. Stopping at the large Camino Inka sign is a must for every group, and you may need to wait for your turn to take a picture. The sign is right between the small train station, where some people arrive, and the Urubamba River.
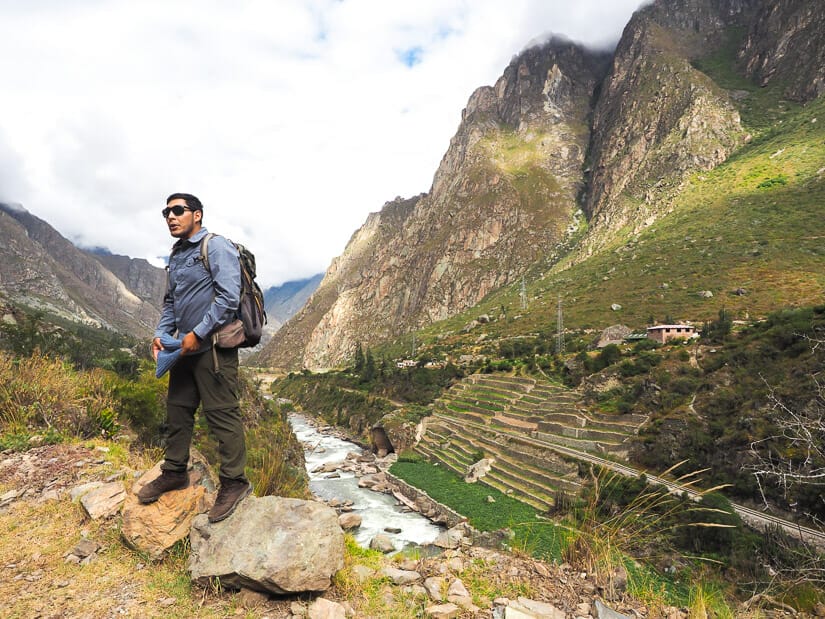
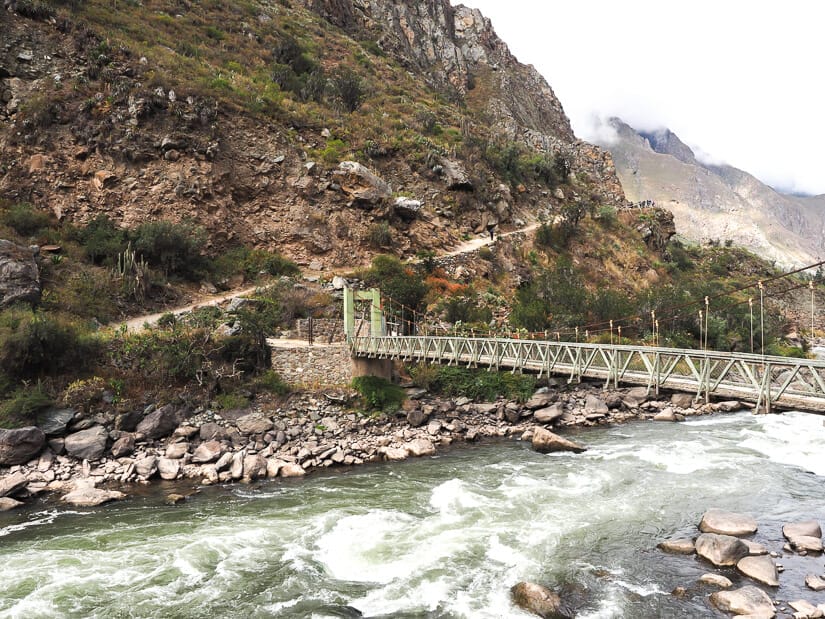
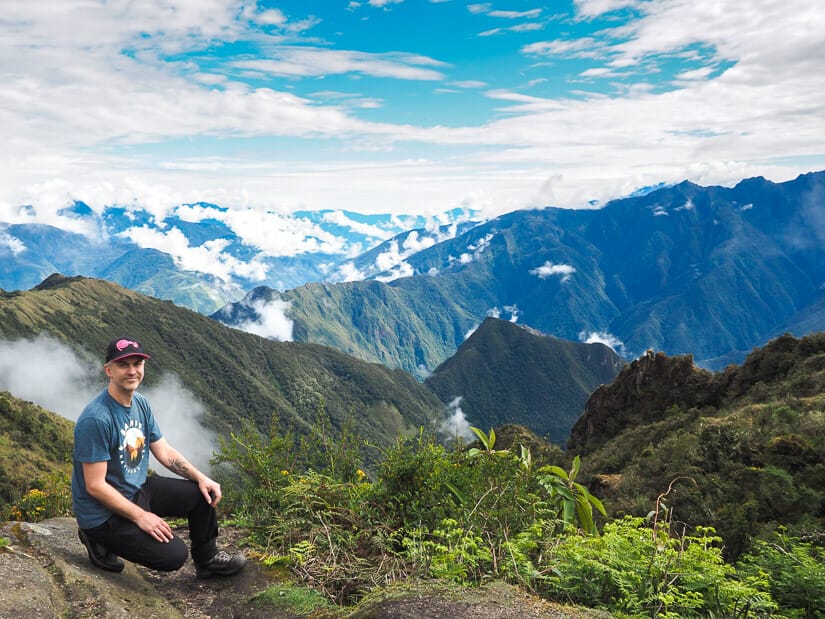
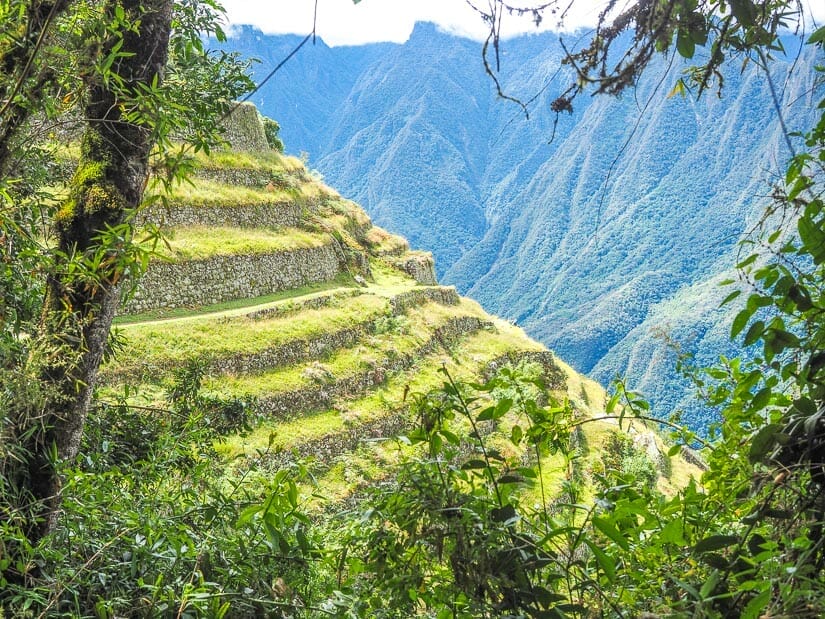
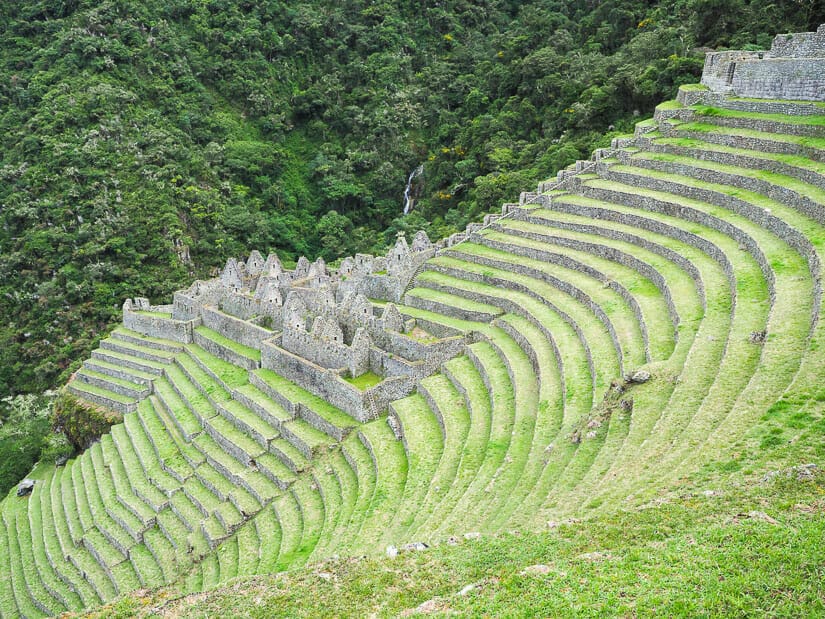
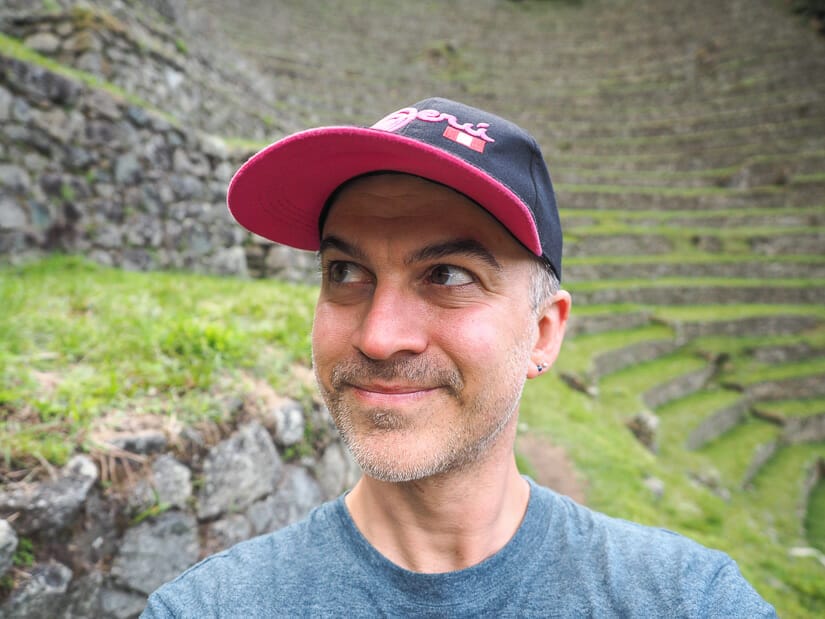
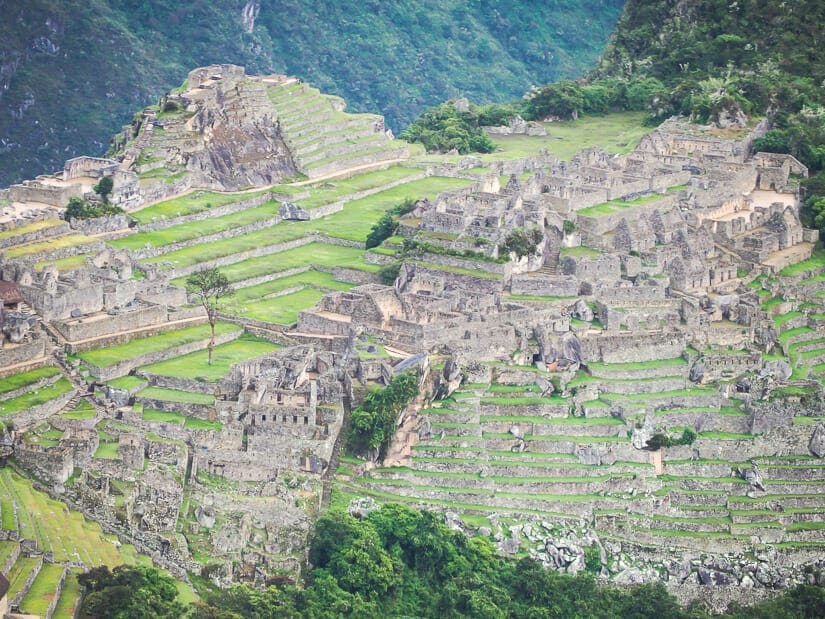
We then crossed a picturesque bridge across the river and finally started our trek! I noted a starting time of 10 AM. From the opposite side, we could already see some Inca terraces on the Piscacucho side, which served as a retaining wall for the tiny village or former rest stop. Today, farmers grow fava beans on the terraces. You can see these terraces in the image above of David, our guide.
A little further in, we also saw the small ruins of Canabamba across the river, an Inca administrative/control point, with trains passing by right in front of it.
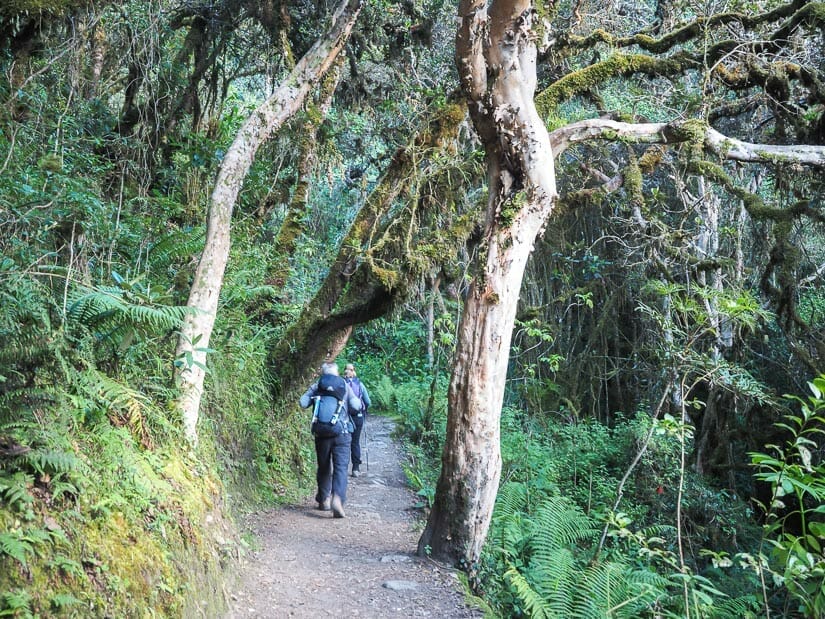
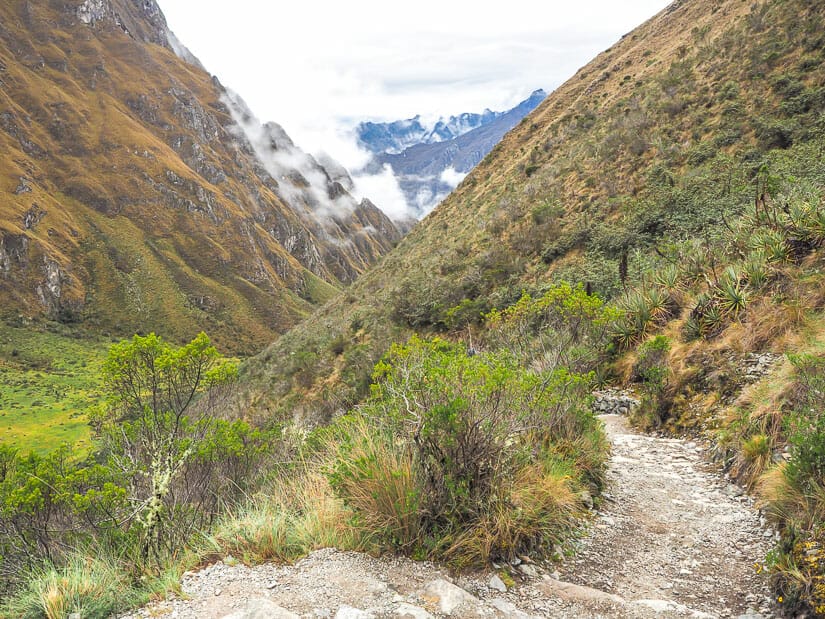
The trail followed the river upstream, going slightly uphill. This would be the norm for our “easy” day. We trekked without rush, stopping frequently to hear David’s talks, especially about plants and flowers.
It felt like we were in no rush whatsoever to get to Camp 1.

Especially cool were the tara trees with hanging Spanish moss, as well as the white parasite found on prickly cacti. This parasite, as David demonstrated, can be rubbed to make a vibrant natural dye. His hand was dyed deep purple for the rest of the day after showing us this – a small sacrifice for the group!
We also saw agave (imported from Mexico) and so many cool flowers on that first day. I was always falling behind the group because I wanted to take pictures of all of them. I admit I got quite into the flowers and plants after David’s talks, and took tons of photos of them.
We passed through some small villages, where there were rest stops with bottled drinks for sale and restrooms (bring coins!)
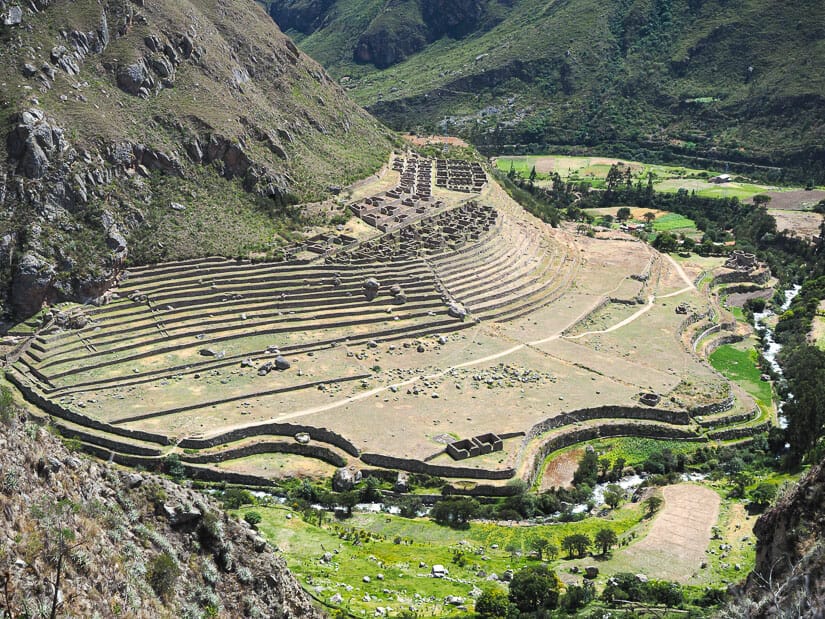
Around 11:30 AM, we climbed our first steep ascent to reach a lookout point of the first major ruins of the Inca Trail: Patallacta. This is a sprawling, stepped hillside which once produced food for Machu Picchu. A river wraps around the base of the site, with an east-facing circular structure similar to the Torreon (Sun Temple) at Machu Picchu.
You’ll actually be looking down on the ruins from another set of ruins called Willkaraqay (Huillca Raccay), which David told us was pre-Inca and actually Wari. He even pointed out features of the building that he said were clearly non-Inca. I was a little skeptical about this, as the site seemed so well-preserved and similar to other Inca ruins. And David’s claim would place it at 1700 years old, or over 1000 years older than Machu Picchu, which seemed far-fetched.
I confirmed my suspicion after my trip by reading this academic paper. The paper indicates that the site of Huillca Raccay was indeed long-inhabited. But the fort we see today at Willkaraqay is an Inca one, contrary to what David explained to us.
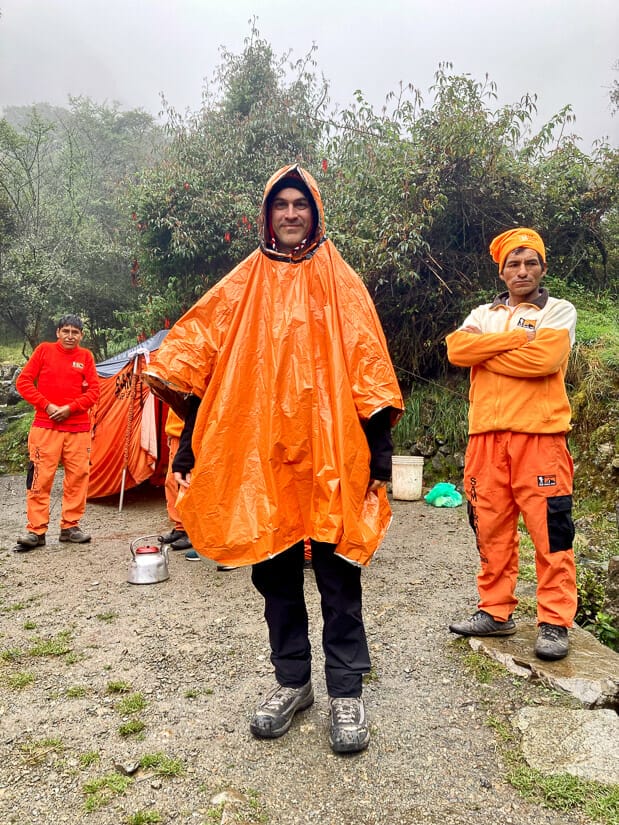
After Patallacta, we veered south up the Cusichaca River Valley, the same river that wraps around Patallacta. We breaked for lunch in our signature orange dining tent, which was all set up before we arrived. (And which, by the way, becomes the porters’ sleeping tent at night!)
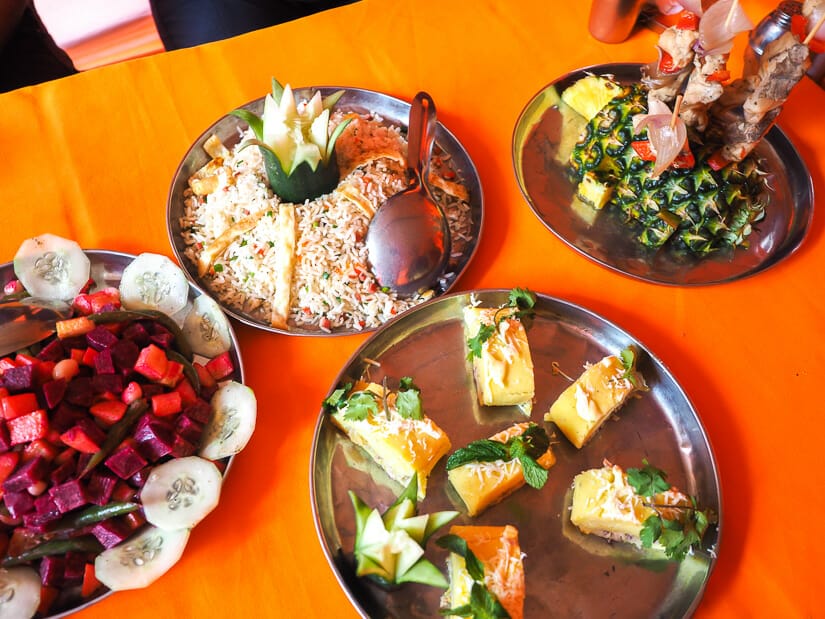
We had a feast that included rainbow trout, avocado and other veggies, yellow rice, fried cheese, pumpkin soup, and garlic bread. We got a few drops of rain here, but it didn’t last.
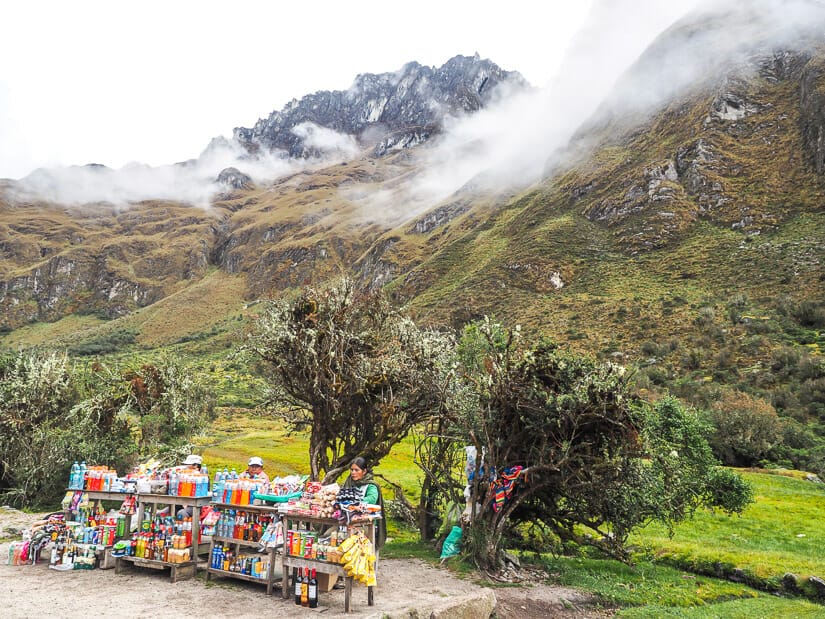
After lunch, we continue on to Wayllabamba, the last town of any size on the Inca Trail. This is often described as the last place you can buy additional drinks or snacks, though I found there were a few more the next day.
Also note, you don’t really need to buy more snacks, as Sam Travel provided some to us every day, plus they gave us all the drinking water we needed. But downing a bottle of Gatorade never hurts!
Many trekking groups, especially those who have a later (usually 7 AM) start from Cusco, spend their first night at Wayllabamba. Rather than a single campground, the camping here seems to be spread out in the backyards of various homes. I’m so glad we hiked further on Day 1, because we had barely done a half day of hiking by this point.
Just above Wayllabamba, we passed a control point where porters have their gear weighed to make sure they are not surpassing the 25-kilogram limit.
By 4 PM, we reached our camp for the night, Ayapata Camp, at 3300 meters – a similar elevation to Cusco.
Tents at the camp were spread out over three large terraces. Restrooms had running water but were quite grotty by the next morning. While the view wasn’t quite as amazing as later camps, we could see several mountain peaks rising up around us.
The biggest surprise when I got there were the ladies selling cold drinks, including beer. I had expected it to a be a dry four days, but could never say no to a cold beer after a day of trekking!
Day 2: “The Hard Day”
Day two is for most trekkers the hardest and longest day on the Inca Trail. This is because you basically climb up the highest pass of the Inca Trail (Dead Woman’s Pass, 4200 meters) and all the way down the other side of it. Then, some trekking companies, including ours, proceed to take you up the second-highest pass of the Inca Trail (Runcuracay Pass, 4000 meters) on the same day, before finally setting up camp.
To get a headstart on this beast of a day, we were woken up with steaming mugs of coca tea at 5 AM, when it was still dark outside. We packed up, ate breakfast, and were on the trail by 6:20.
We started the day by walking gradually uphill for two hours though a forest. We spotted carnivorous flowers, orchids, and beautiful queñua (polylepis) trees.
Things got real when we reached Llulluchapampa Camp, which sits on a broad plateau surrounded by mountains. People who do the 5-day trek usually sleep here on night two.
This was the actual last point where we saw drinks for sale. This included the usual Gatorade and water, but also beer and whiskey, for anyone who could imagine still drinking liquor at this point.

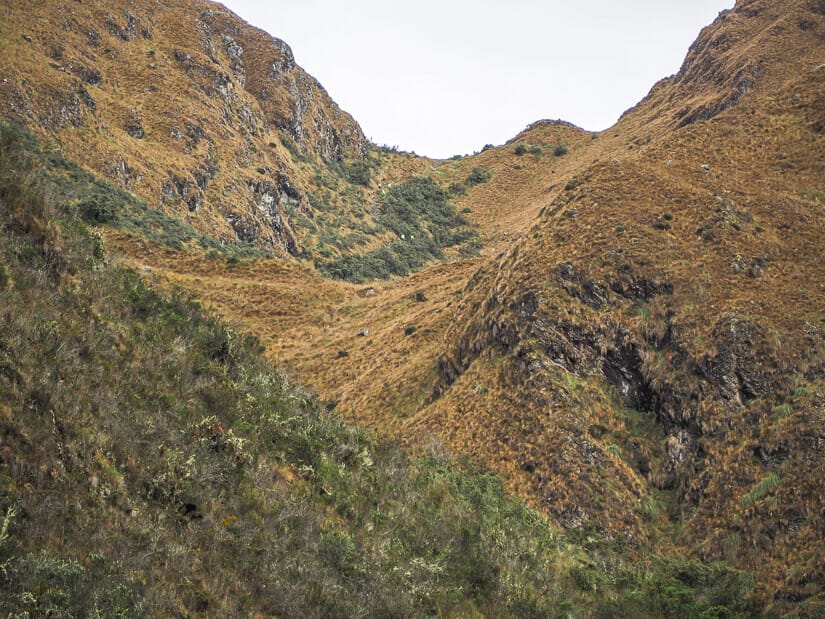
From here, we had our first view of Dead Woman’s Pass, which we would soon be summiting. You can’t see the woman’s shape from this side, though.
Looking in the opposite direction from where we stood, Bonanza Mountain dominated the view.
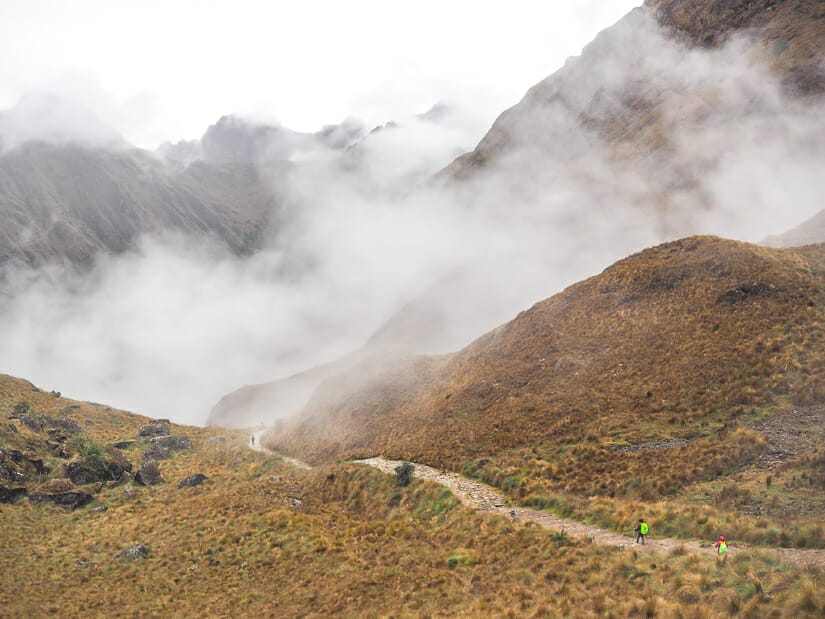
This also marked the point when it started to rain on us, and it wouldn’t stop for the rest of the day. From here, the trail also got much steeper (of course). Needless to say, it was a real slog up to the pass!
Unfortunately, the rain and low-lying clouds robbed us of any view from the pass and gave us the serious chills. I can only imagine how epic the view from the pass must be, looking in either direction.
On the plus side, there were some llamas to greet us at the top. And despite the rain, at least it wasn’t snowing, which actually happened in a freak storm a few days after we were there!
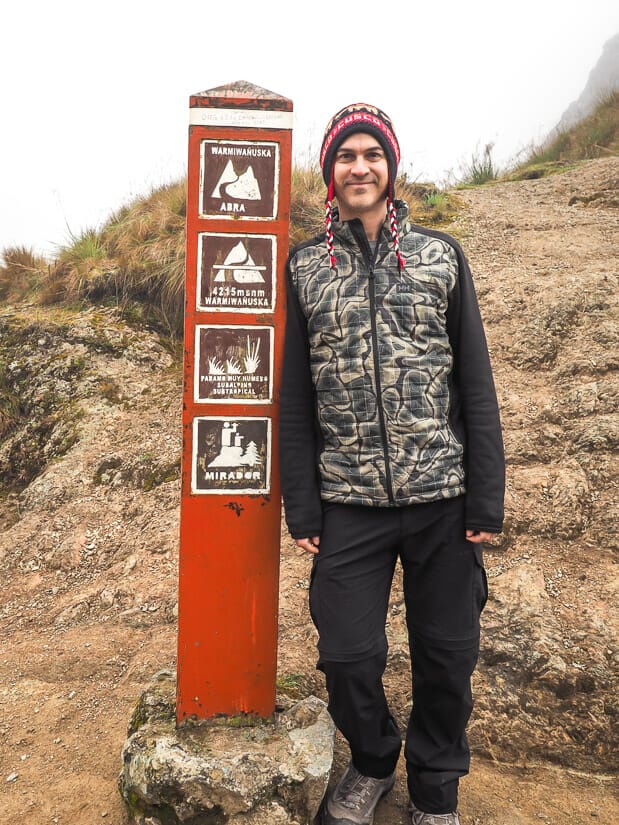
The name “Dead Woman’s Pass” (Warmi Wañusqa) comes not just from the pass’s resemblance to a reclining woman but also the fact that a literal dead woman, a mummy, was found near the pass. Standing on the pass and looking in the direction that you’ll be descending next, the mummy was found on the peak to your left.
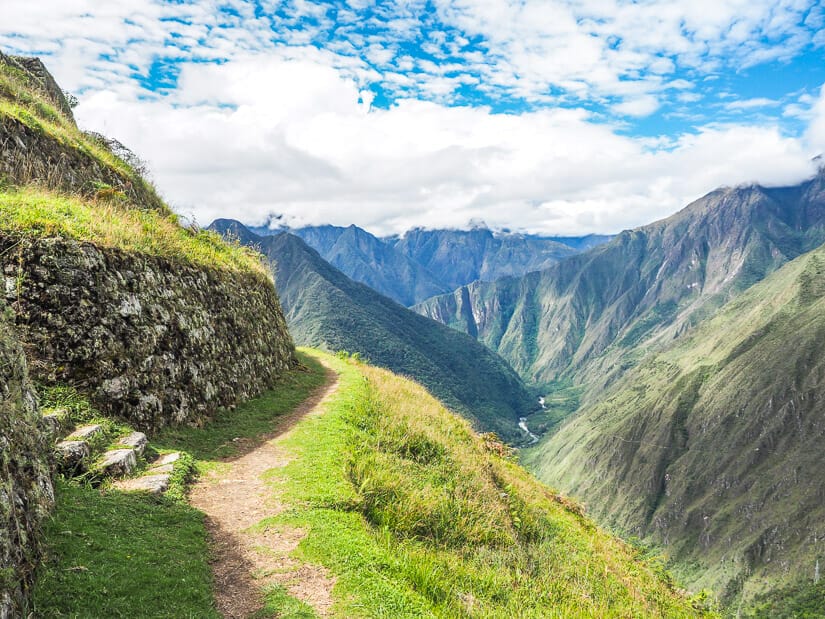
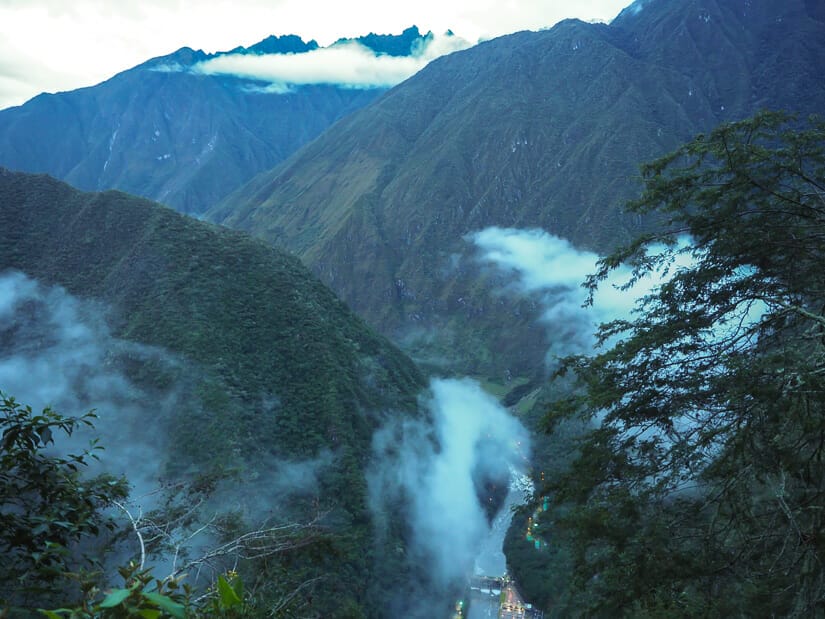
From the pass, we descended steeply down the other side. The clouds dissipated for a few brief seconds, giving us a fleeting glimpse of the valley before us (see image below), before they came back and continued and to obscure views and dump rain us incessantly.
Reaching the bottom of the valley between the two passes, we took a break for lunch. We were wet and very tired. Some trekking groups call it a day here, but not us. We had a second major pass to summit.
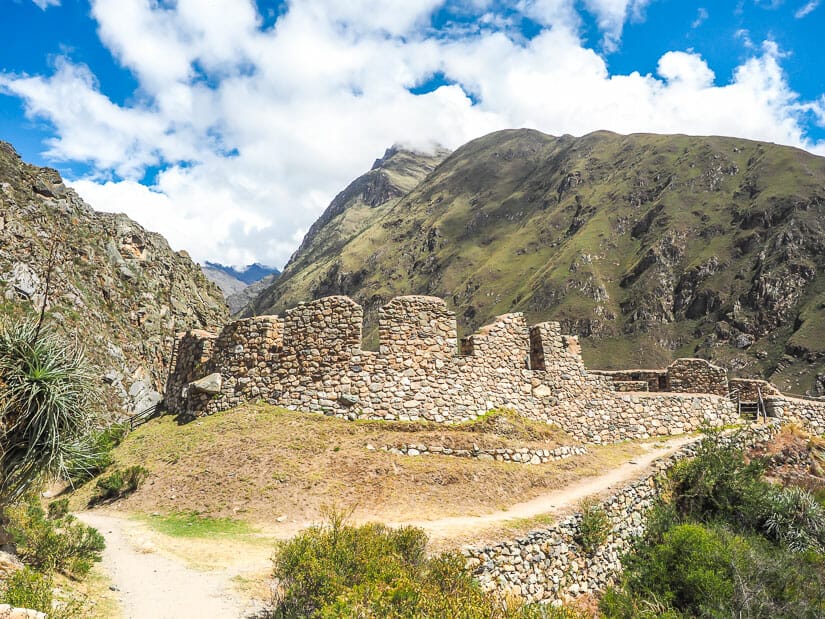
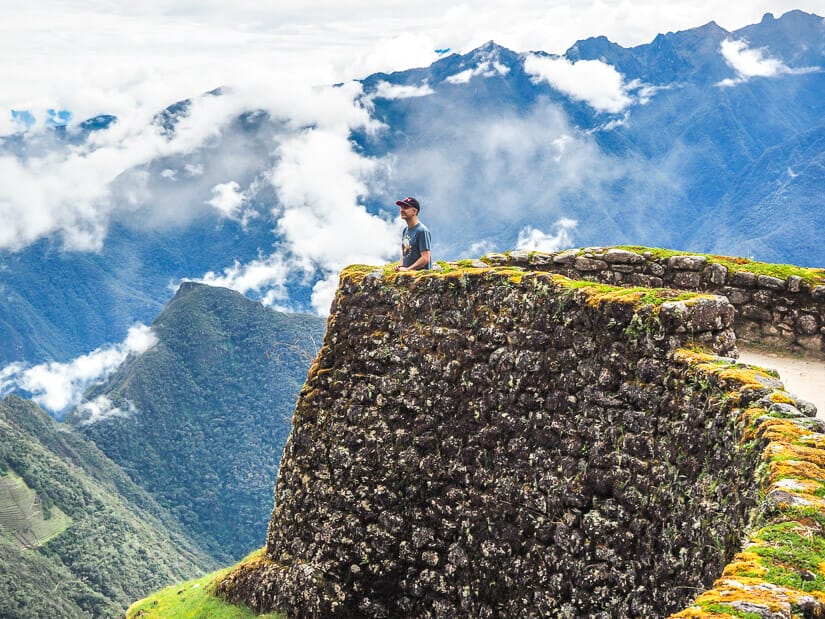
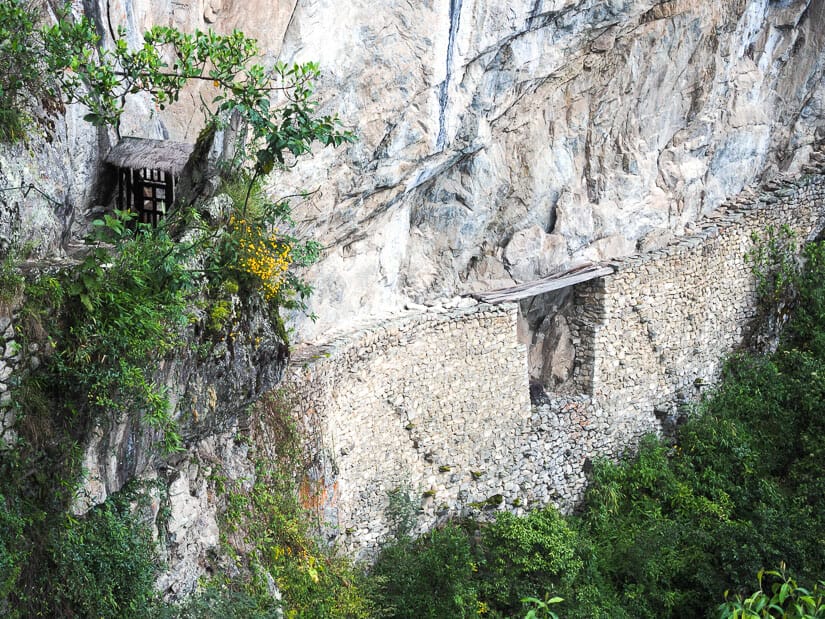
The trek up to Runcuracay Pass was even steeper but shorter than the previous pass. The only thing I can now remember about it is lots of rain. After 40 minutes of climbing toward the summut, we reached Runcuracay ruins. These circular ruins have been compared to a TV dinner tray, with compartments for different foods.
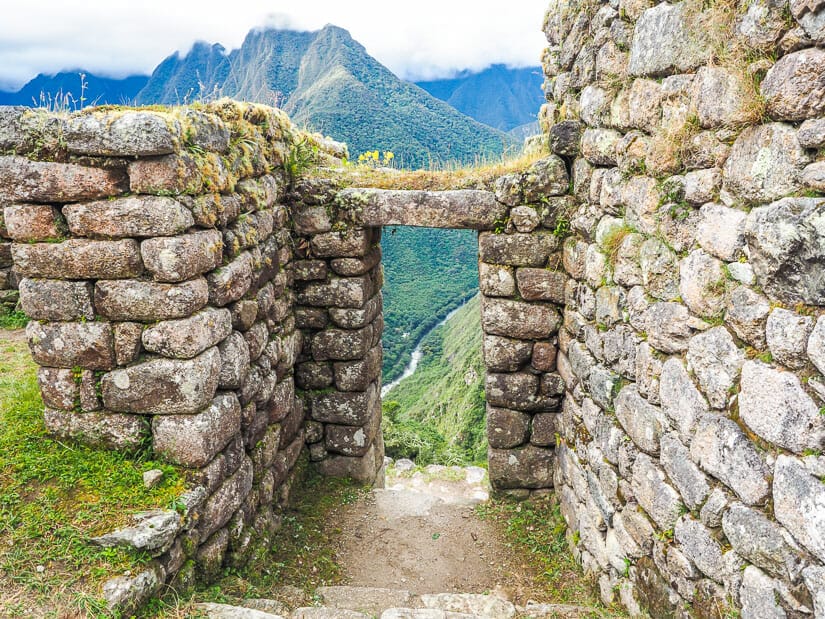
Two things surprised me about the ruins. First, there’s only a single super narrow entrance to the ruins. You can see it in the middle of the ruins in the above photo. You literally have to squeeze through to enter!
Second, the view from the ruins is absolutely epic, even when the weather is crap. From here you can best make out the shape of the reclining woman at Dead Woman’s Pass. Unfortunately, I didn’t dare take out my camera because it was raining so hard when we were there.
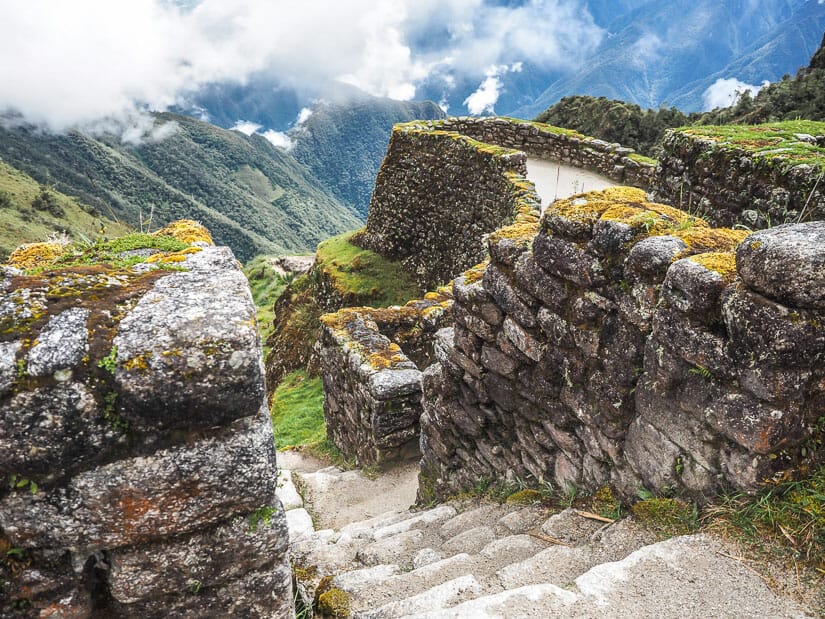
The trail then rises above the ruins. You’ll get a few chances to enjoy the best view of the ruins, looking down on them, which is when you can really see their signature “dinner tray” shape. I took the above photo at the last spot we could see the ruins from.
Next, you’ll notice two small lakes, one on the left and another on the right, before reaching the second-highest pass, Runcuracay Pass (4000 meters). Like the first pass, our second one was totally disappointing, as we couldn’t see a damn thing. I didn’t even bother trying to take a picture.

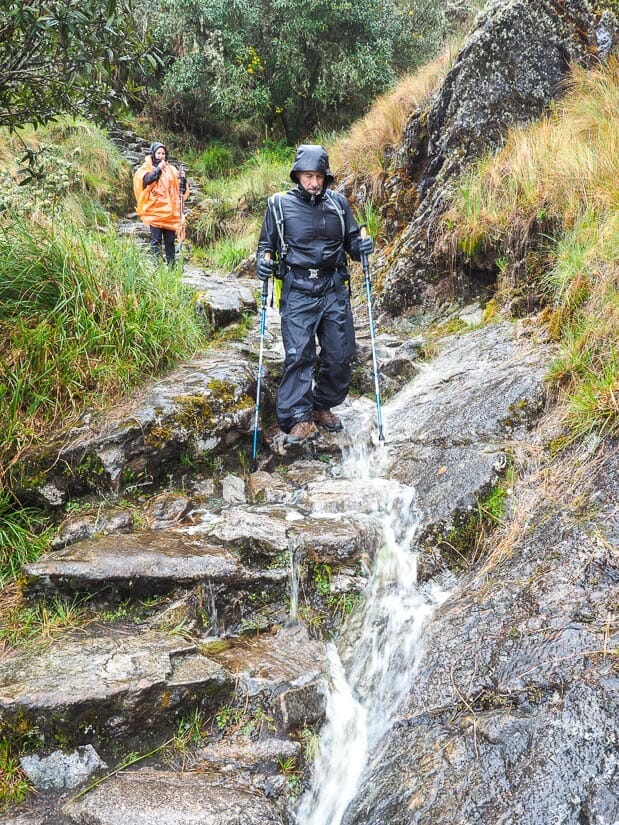
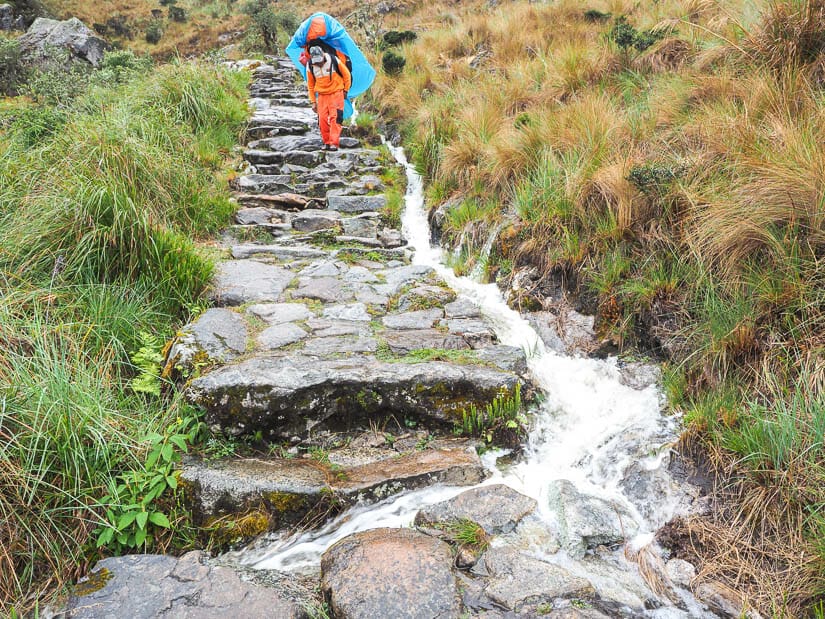
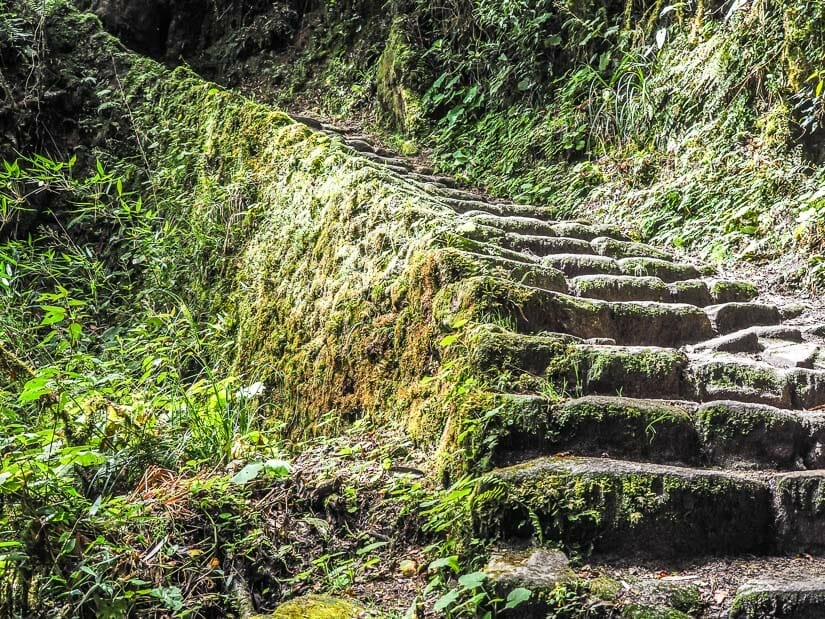
The descent from Runcuracay is especially steep. After a brief pause when the trail passed through a tunnel just below the summit, we proceeded with extreme caution, especially with the wet trail. This is the point in the Inca Trail when I was most thankful that I had a hiking pole. If you have bad knees like I do, then I highly recommend using one (or two) hiking poles. I rented mine from Sam Travel for $10.
With constant rain throughout our descent, we found ourselves walking past and even through small waterfalls, streams, and breakaway canals crossing the trail.
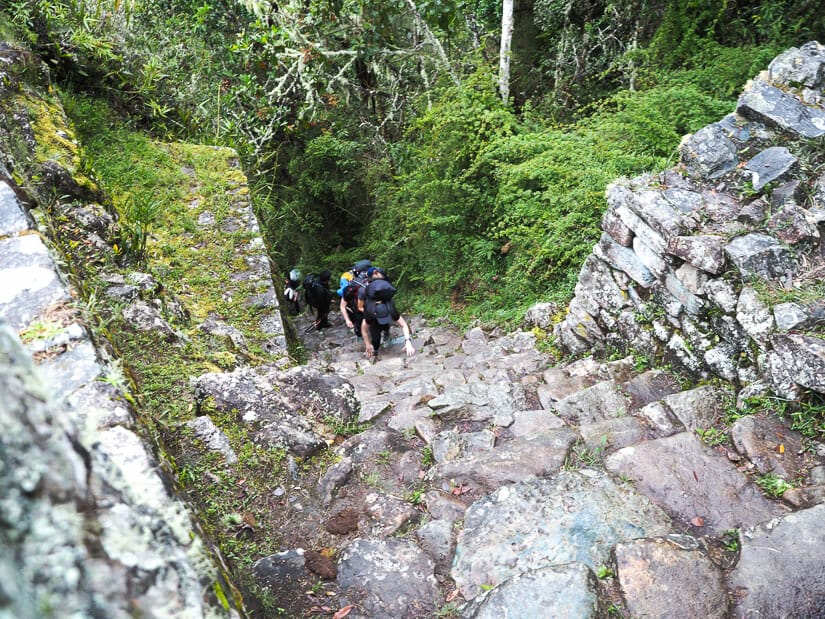
After about an hour of descending, we reached the final ruins of the day, Sayamarca. These ruins are an optional side trip that require climbing a very steep set of 100 stairs from the trail.
Exhausted from a long, tough day of hiking in the rain, some members of our group didn’t even bother. The guide himself, who looked totally pooped himself, just waited at the bottom for us.
I feel like I would have loved Sayamarca ruins. The name means “inaccessible town”, and the ruins are said to appear to hover or levitate on the side of the mountain. A horseshoe-shaped building at the top has windows facing the solstices, while platforms lower down have views of the Aobamba Valley (a tributary of the Urubamba).
For our visit, it was still pouring, and there were no views to be had. I was completely dispirited at this point. The day had been so long and tiring, I was soaking wet, and I’d missed out on so many views and photo ops because of the rain. This was yet another.
I didn’t want to skip it, but I was too tired and wet to really enjoy it, either. On a clear day, I easily would have spent an hour exploring every nook and cranny of this site, especially knowing that camp was so near. Instead, I just took a quick look, snapped a few obligatory photos (and soaking my camera in the process), then moving on. Luckily my mirrorless camera and Olympus lenses are weather resistant and can handle some rain, just not too much.
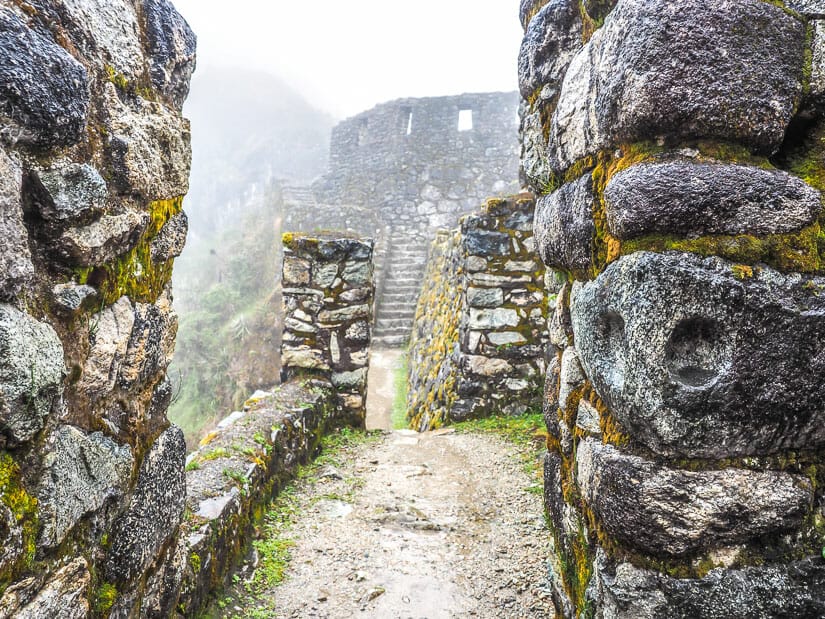
From there, it was a 20-minute walk to camp via some small ruins called Qonchamarka. The trail passes some cute terraces at the base of a small stone fort. Another spot I would have loved to stop and appreciate longer, but just couldn’t.
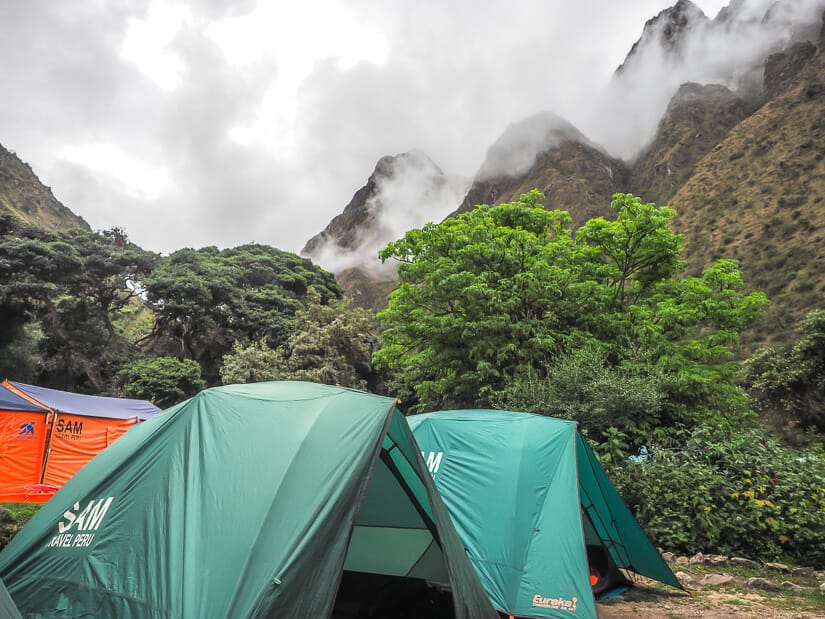
The rains tapered off a little once we reached Chaquicocha Camp (of course), coming back here and there for the rest of the evening and night.
This sprawling campground sits at 3650 meters, the highest camp on our Inca trail 4-day itinerary, and also the coldest night we would have.
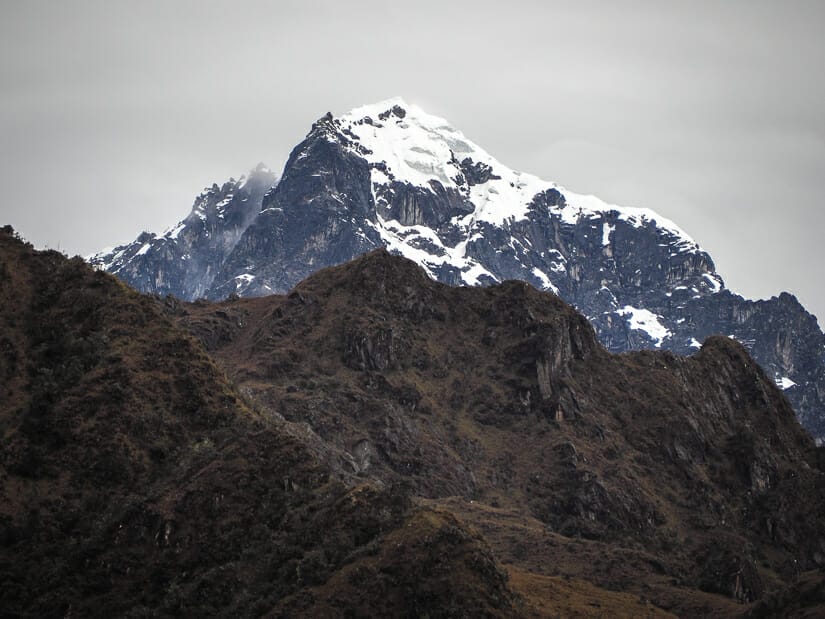
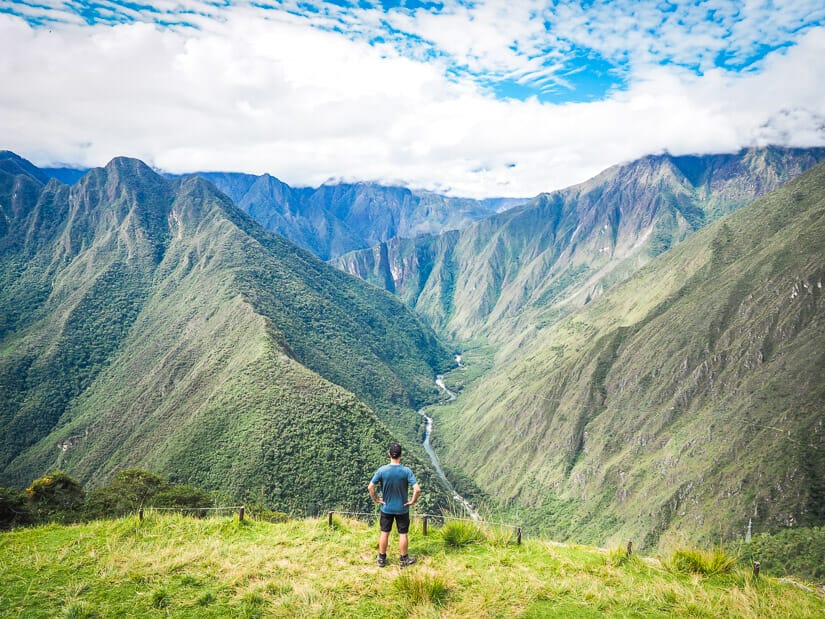
This camp has especially stunning views. We could see incredible peaks looking in all directions. Looking I ahead, I could see Pumasillo of the Vilcabamba range, which lies west of Machu Picchu, around the famous ruins of Choquequirao.
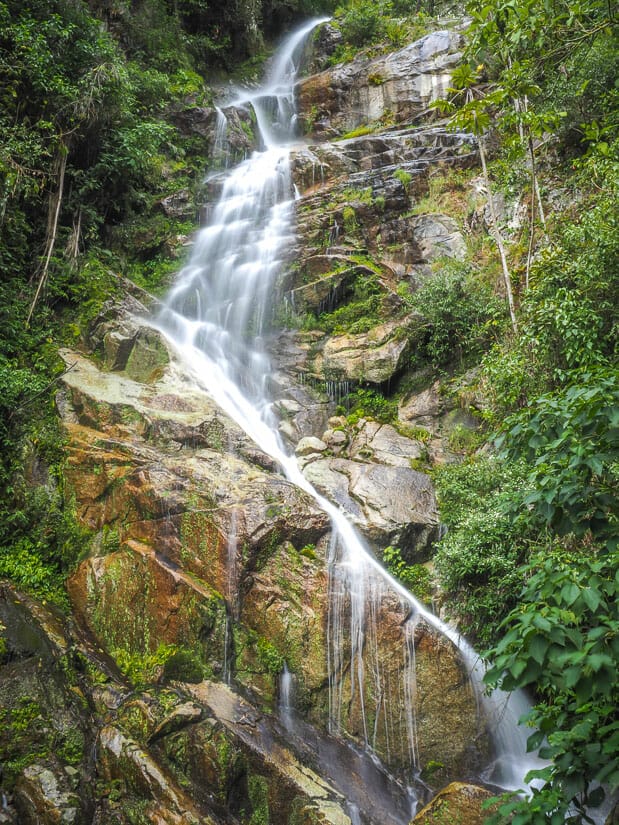
Much closer, though, the peak of sacred Salcantay rises above Sayamarca mountain, waterfall, and ruins, where we had just come from. Look closely and you can see the ruins (though not in the below photo).
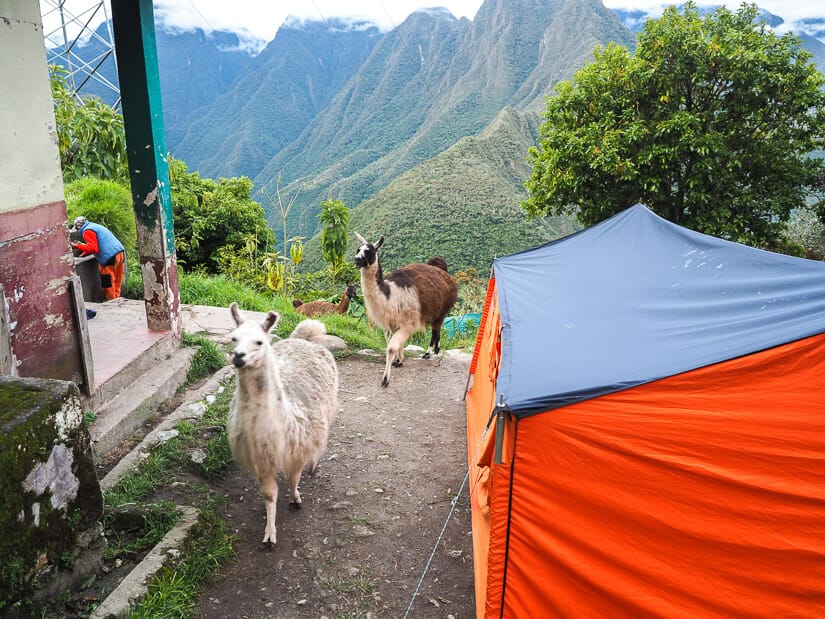
There are also supposedly resident llamas at this camp, but we didn’t see them.
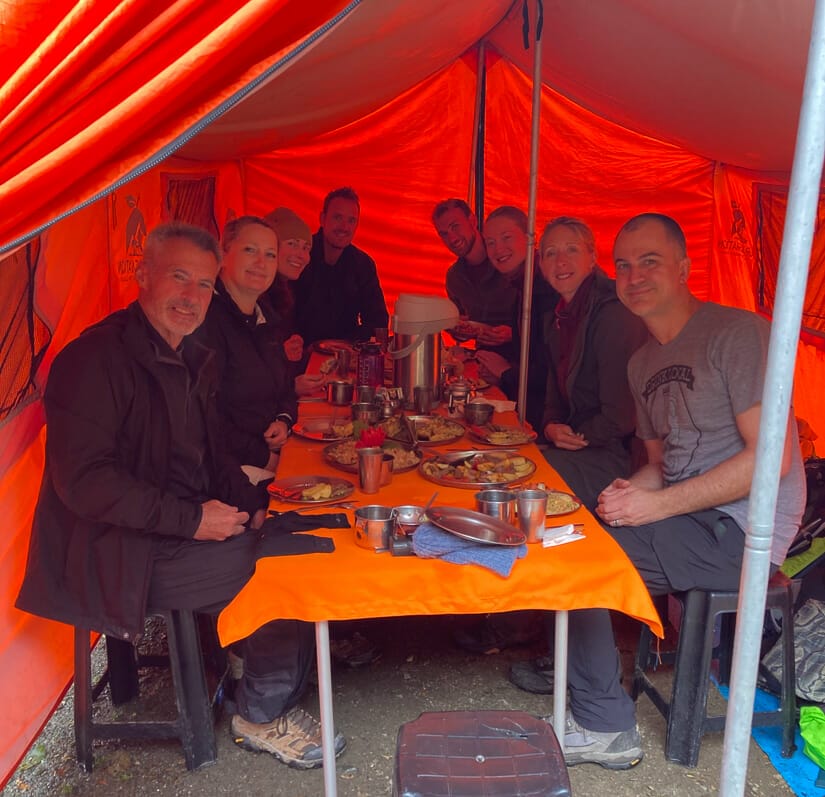
After dinner, we had a lovely gathering in which we introduced ourselves to all the porters and chefs, and vice versa. We also took the chance to take an epic (and rain-free!) group photo.
Day 3: The Best Day
One of the best parts of having a really long and tiring Day 2 is that you get to a have a much easier and shorter Day 3. This day is often described as the “best day yet”. I even call it the Best Day, period, of my whole Inca trail trek – that’s right, I enjoyed it more than Day 4, the day we saw Machu Picchu!
This is partly because we had a (mostly) rain-free day on Day 3. But also, the trek was several hours shorter and much easier to handle than Day 2, so it felt like a walk in the park. It was almost totally downhill. But the biggest thing is that the ruins were just amazing, including my favorite ones on the entire Inca Trail – I’ll get to that below.
We started Day 3 with a 5:30 wake-up and 6:00 AM breakfast. But we didn’t actually start out until later than planned because it was (STILL!) pouring rain. Luckily, though, it did actually stop at some point, and we had a relatively rain-free day.
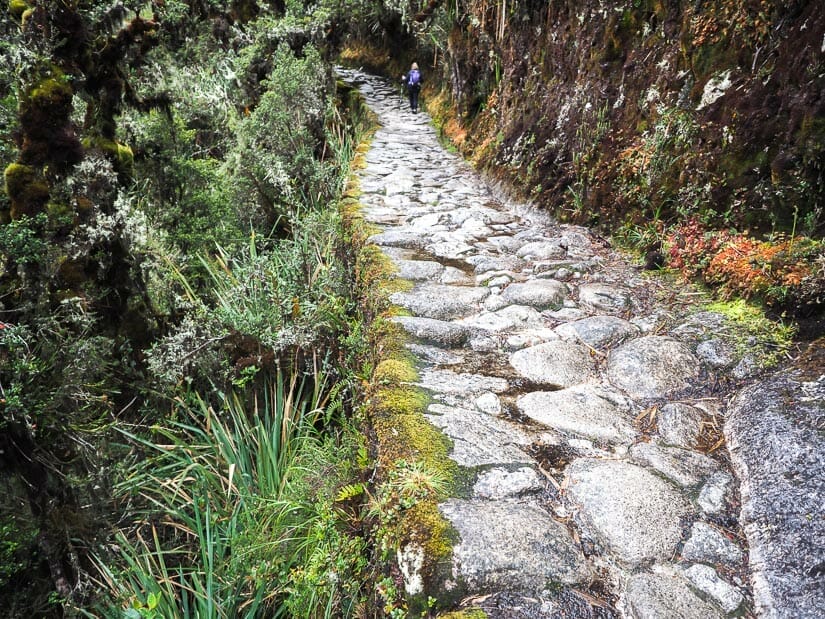
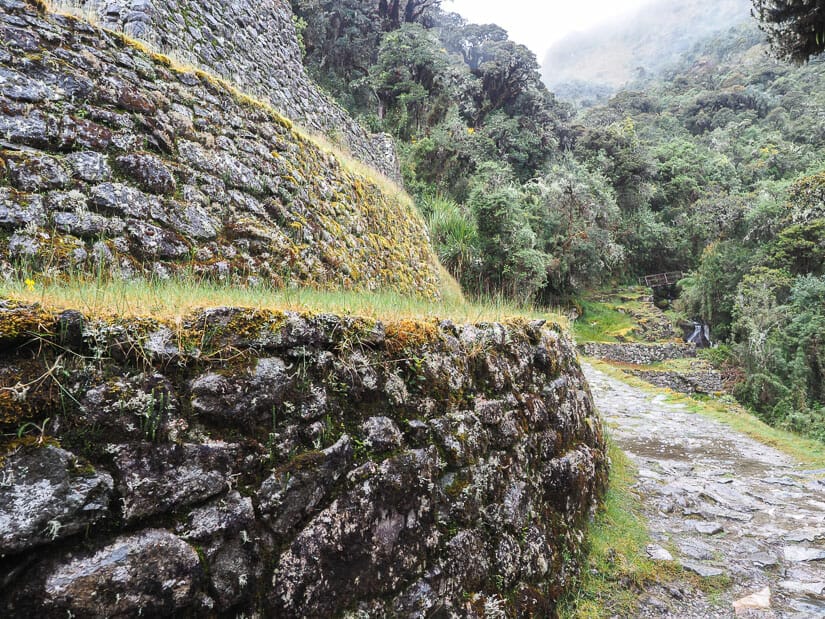
Our day of trekking started with a gradual ascent to the third-highest point on the Inca Trail.
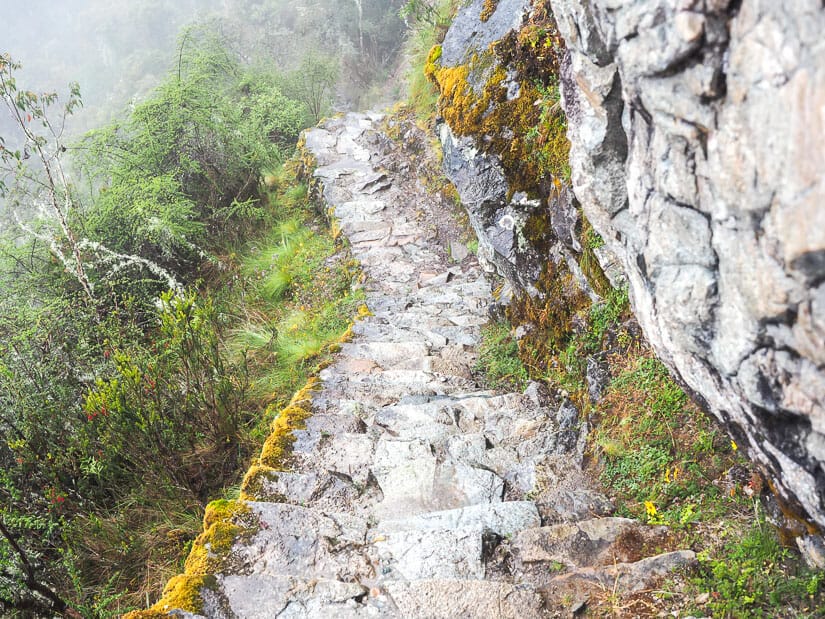
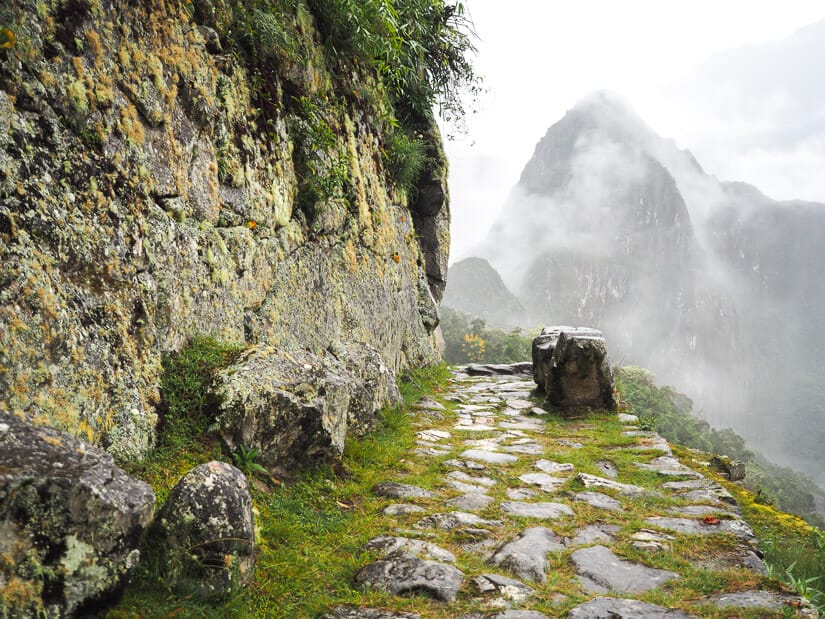
On the way, we walked some particularly photogenic sections of original Inca trail – this is where I shot the cover photo of this article. By peering over the side of the trail, we could see just how deep the foundation walls of the trail went – several meters in some parts.
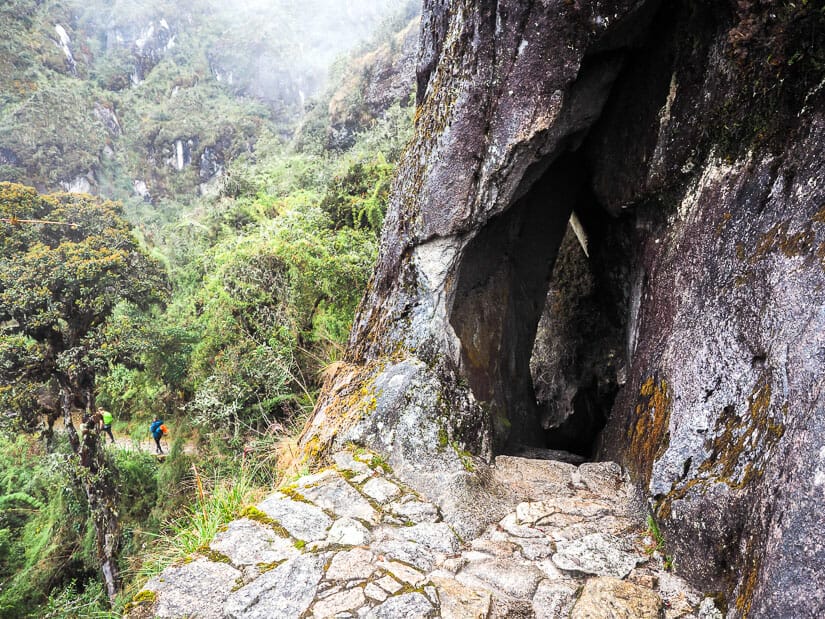
We also passed through an Inca-enlarged cave as well as an incredible viewpoint of Veronika glacier.
Phuyupatamarca Pass (3580 meters), the third highest point of the Inca Trail before it plummets down to Machu Picchu, also serves as the final camp for those hiking the five-day trail.
The not-so-private campground occupies the summit, and the trail passes right through the middle of the camp.
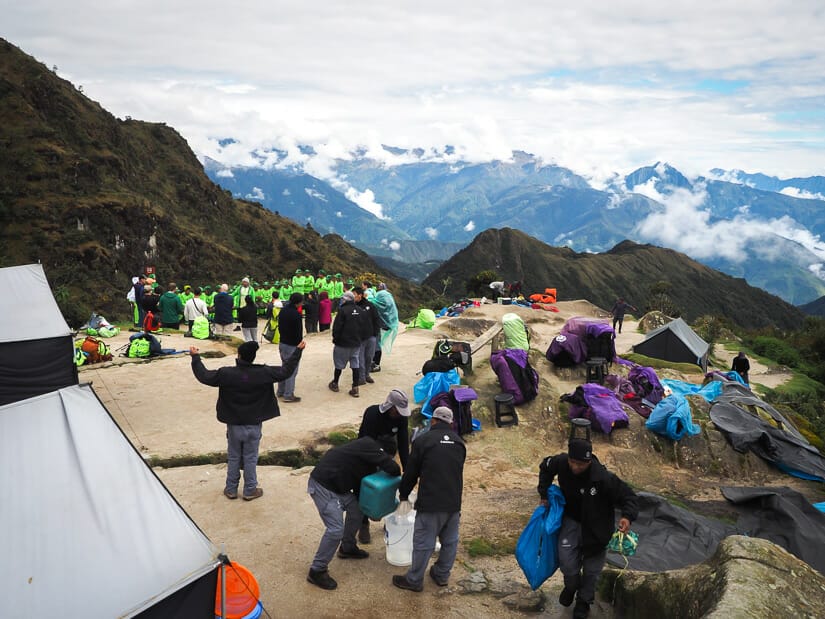
The views from here are epic. On one side, we could see all the way down to a part of Aguas Calientes town. Because of this, you can actually get phone reception at this camp – one of the few spots on the Inca Trail like this. David made use of this by rapidly checking as many important messages as he could.
On the other side, by climbing to the highest point above the campground, you can enjoy a fantastic view looking down on Phuyupatamarca ruins, which we would see next, and even the summit of Machu Picchu mountain!
You can’t quite see Machu Picchu ruins yet, though. We spent quite some time snapping photos here, especially after a full day or rain and so few photo opportunities the day before.

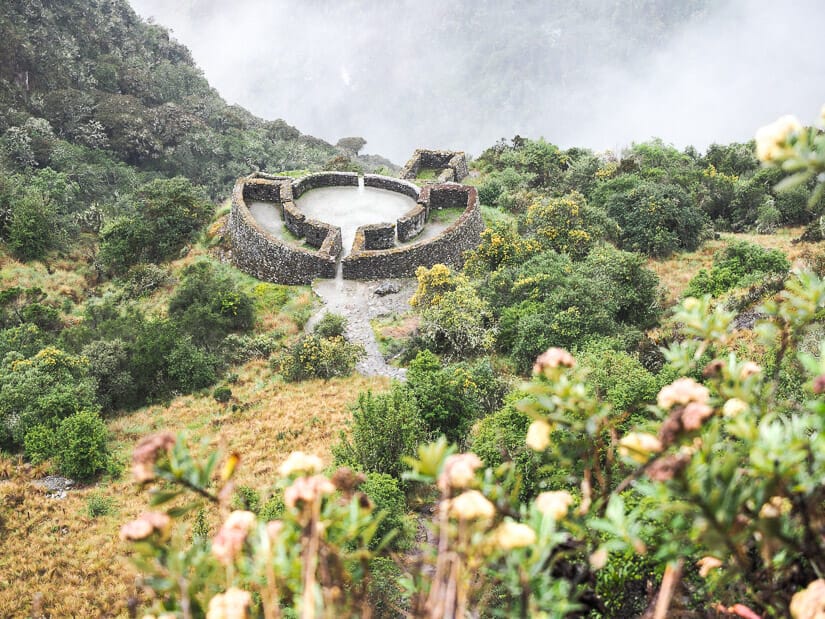
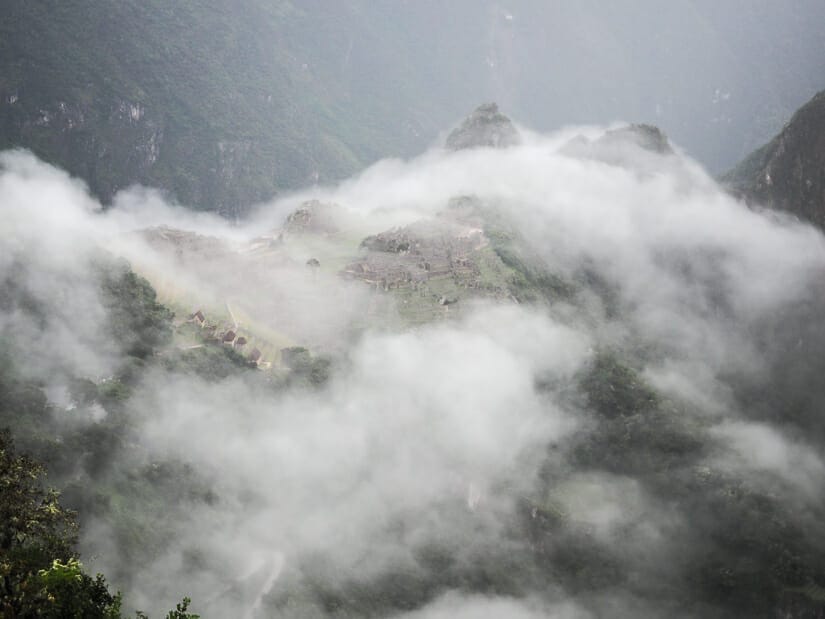
Next, it only takes a few minutes to descend to Phuyupatamarca ruins. Called the “town above the clouds”, this fort and ceremonial site really does lie enshrouded in clouds for much of the year, especially in the rainy season.
These ruins and the view from them are simply stunning, including some really cool lookout platforms and fountains where I saw porters collecting water for the nearby campsite.

I was a little disappointed here that our guide just sat us down in one of the rooms and gave us a very long spiel about Inca cosmology – really nothing to do with that particular ruin. I would have loved to have more time at these ruins to just explore them and take pictures. But I realize it’s also my fault for not bringing this issue up when I should have.
I did managed to explore the ruins a little after the rest of the group rushed down to the next site.
And I say “down”, because that’s what the trail would do non-stop for the rest of the day. Down, down, down we trekked.
The weather seemed to get warmer, and the surroundings greener, by the minute. We saw an increase in butterflies and other insects, as well as flowers and tropical plants. Supposedly, if you do the four-day Inca Trail in the rainy season you can see even more!
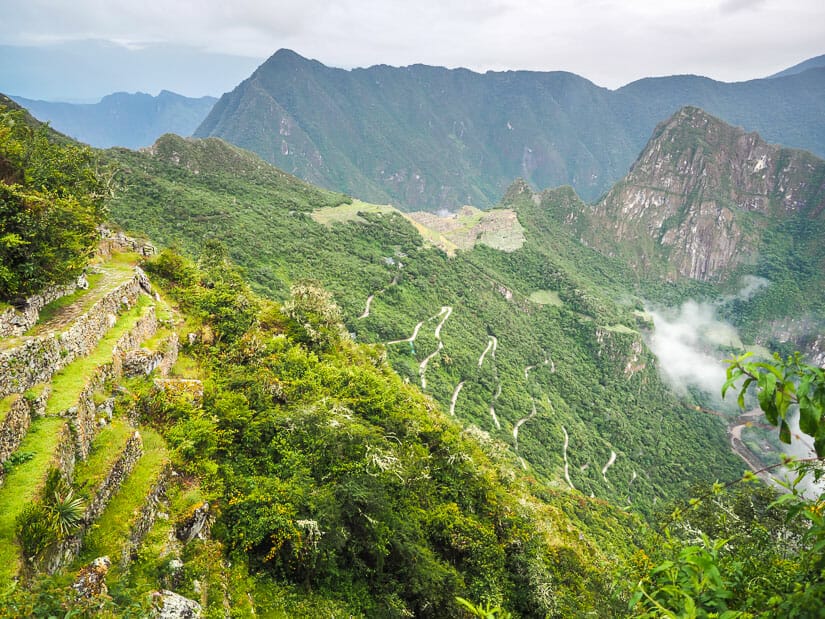
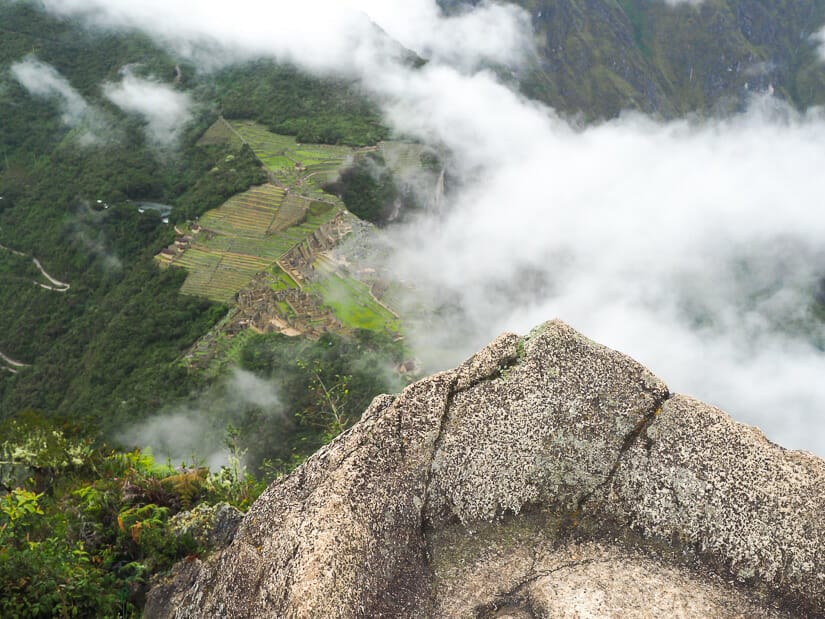
After about 1.5 hours, we reached Intipata, another incredibly impressive Inca site. This one consists mostly of terraces, very steep ones. You see them several times from afar before reaching them.
The trail feeds into the middle of them. The views looking down the valley from there are especially dramatic.
It only makes sense to take a lot of pictures here, especially of the group, as you can have one person (yes, the guide will volunteer to do this) on a higher up terrace taking photos looking down at the group with the valley behind.
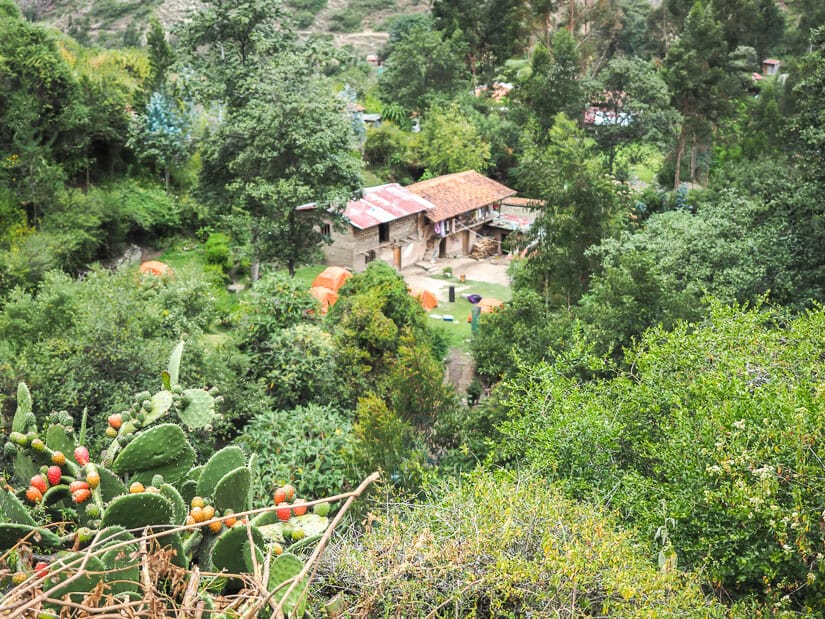
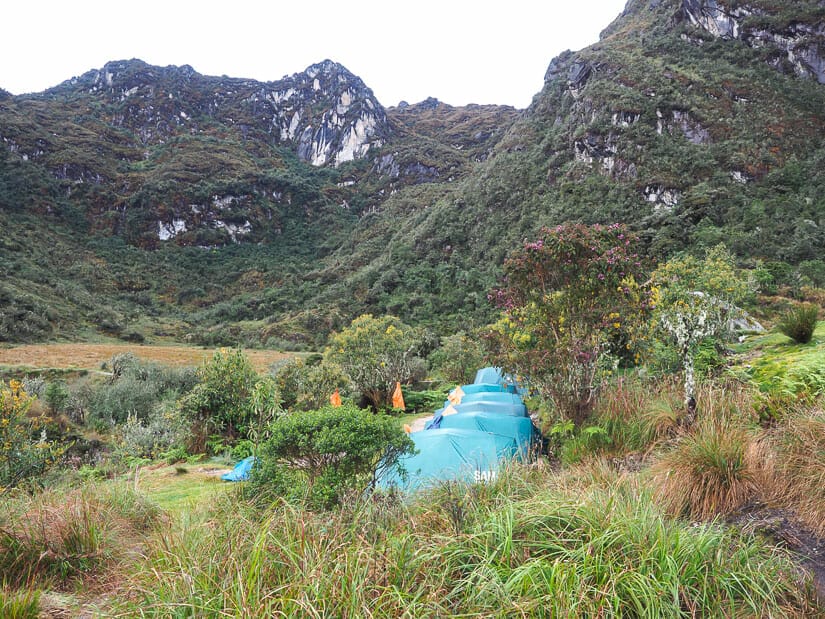
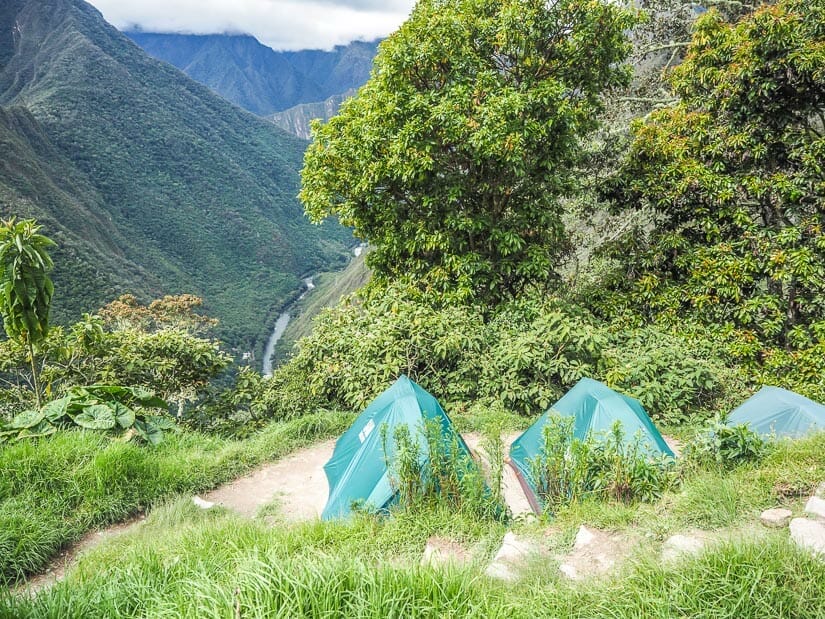
Wiñay Wayna campground, our stop for the night, is also clearly visible to the right when you’re looking down from the terraces. You can see the campground in the below photo.
From here, the trail goes into the forest at the side and winds around to a lower terrace (or you can take a steep staircase down and surprise everyone else at the bottom, as David did!) It is then a 25-minute easy stroll down to Wiñay Wayna campground.
I had read all about Wiñay Wayna campground before. There used to be a legendary pub / bar at the campground, but too many hungover trekkers and disastrous falls led to it being closed years ago.
I was surprised to find that our camping spot was right next to the original bar building! You can still sneak into it and see the ruins of what must of have once been an incredible meeting spot of travelers and their tales.
I really felt that we had the best camping spot at Wiñay Wayna campground, not just because of the bar/history, but also because the short trail to Wiñay Wayna ruins starts right beside it. My tent, as the highest in our camp, was literally 10 steps from the entrance gate to Wiñay Wayna!
The Wiñay Wayna ruins ended up being my single favorite spot on the entire Inca Trail, even beating out Machu Picchu. It was one of those rare but special travel moments when all the factors come together for an experience I’ll never.
First all all, these ruins are simply incredible. Wiñay Wayna are second only to Machu Picchu itself on the Inca Trail. They include sprawling terraces, upper and lower urban areas, a Grand Staircase with 11 fountains between them, and windows that perfectly frame an epic waterfall. The name means “forever young” and is related to a small orchid that grows in the area.
One of the main reaons I loved this Inca site so much is that I had the entire ruins 100% to myself for most of my visit. This was a massive contrast to Machu Picchu, which was crowded AF.
But how was this even possible, especially with all the other trekkers on the same route as us?
Well, our trekking group, and probably most others, had lunch as soon as we got to the campsite. Then they take a siesta before going to see these ruins later in the afternoon. I decided to skip siesta and go see the ruins right away.
I think we had also beat some of the crowds that day. Keep in mind that all the trekking groups who had a shorter Day 2 than we did were now making up for it with a longer Day 3.
Finally, it had just started raining when I made the split decision to visit the ruins ahead of my group.
The rain probably turned any other potential visitors off. They probably opted to stay in their cozy tents instead and wait for the rain to end. And the rain really did end as soon as I reached the ruins!
I would go as far as to say that I had a spiritual experience at Wiñay Wayna. It was just me and the ruins, like how Che Guevara and his motorcycle mate Alberto Granado experienced Machu Picchu, as portrayed in The Motorcycle Diaries, a movie/book I’ve seen/read about a million times.
It was better than I could have hoped for, and made up for the disappointing, rainy, overcrowded experience I would have at Machu Picchu the next day.
Day 4: The Machu Picchu Day
The final day of the Inca Trail 4-day trek involves a crazy early wake-up time, a short hike to the Sun Gate, where you catch your first glimpse of Machu Picchu, and a tour of Machu Picchu itself.
The entrance gate to the Machu Picchu citadel, where you have to show your passport and Machu Picchu ticket (usually held by your guide) is only five minutes from the Wiñay Wayna campground. It may be even closer, depending on exactly where in the campground your group sets up – it’s practically part of the campground.
The entrance gate opens at exactly 5:30 AM. But here’s the silly part. Every trekking group wants to be the first in the line to get in. Therefore, most groups wake up around 3:00 to 3:30 AM to race to the line and secure their spot. Then you have to sit there in the dark for 1 to 2 hours, waiting for the gate to open.
If you have rain on your trip like we did, getting to the gate early also means you’ll have the chance to sit under the covered waiting area. But this waiting area is huge, so 80% of the trekkers can actually fit under it. Only the absolute slowest/latest 20% of people, give or take, will end up standing in line outside of the covered area.
This all seemed quite ridiculous to me. I didn’t understand the rush here. Everyone gets through relatively quickly, then the faster hikers naturally make their way to the front and get to the Sun Gate first. If I could choose, I would rather sleep an extra two hours then be the last one through the entrance gate.
According to David, all the porters are rushed on the last day, too. This is because as soon as we leave camp, they need to pack everything up, hike out, return all the equipment, and then return to their villages/families. So part of the rush is that they just want us out so they can get on their way.
Anyway, our wake up-time was 3:15 that day. We were given a bagged breakfast, which we then once we actually had appetites while waiting for ages in the ticket line.
We weren’t first in line or even close to it, but we managed to get one of the last benches, so at least we could sit.
Once we finally got through, it was still dark, but the sky was starting to brighten as we embarked on the easy 1.5-hour walk to the Sun Gate. Most of the trail was flat or mildly undulating.
As it got brighter, we enjoyed beautiful views down the Urubamba valley to the right. We heard and sometimes saw trains making their way up the valley towards Machu Picchu.
The final 20 minutes of the hike got steeper, including the “Gringo Killer” staircase, which wasn’t as bad as it sounds. The mood was celebratory when we reached the Sun Gate (Inti Punku) and enjoyed our first view of Machu Picchu in all of its glory!
While the Sun Gate is typically billed as the place where you will “see the sunrise light up Machu Picchu”, you have to be quite lucky to see actually see that happen.
With all the clouds when we visited, there was of course no special sunrise or magical rays of sunshine lighting up of Machu Picchu.
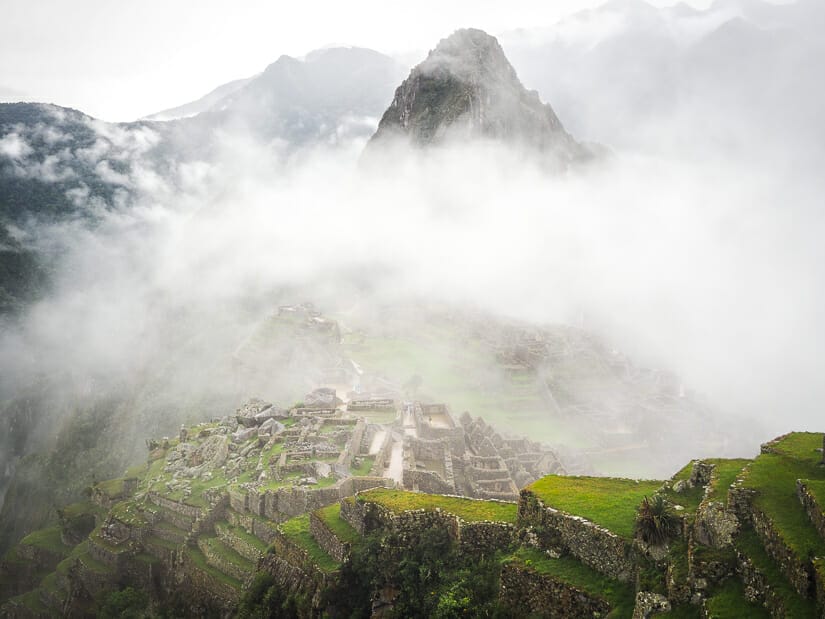
Despite the heavy clouds, we luckily could see the whole Citadel. But this changed quickly. No sooner had we arrived than it started raining – and it would never stop. The clouds rolled in, totally obscuring Machu Picchu. We didn’t realize it at the time, but we wouldn’t get a clear view again of Machu Picchu for the rest of our visit.
Minutes later, a member of our group stepped off the trail to pee and twisted her ankle.
The rain got heavier on what should have been an exciting 30-minute descent to the Guardian House, the area where visitors enjoy the “classic” postcard view of Machu Picchu.
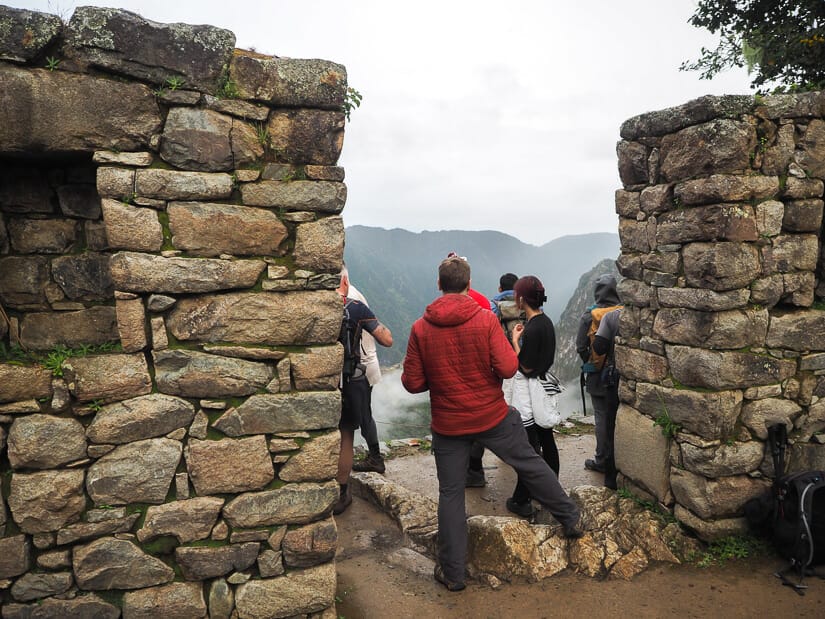
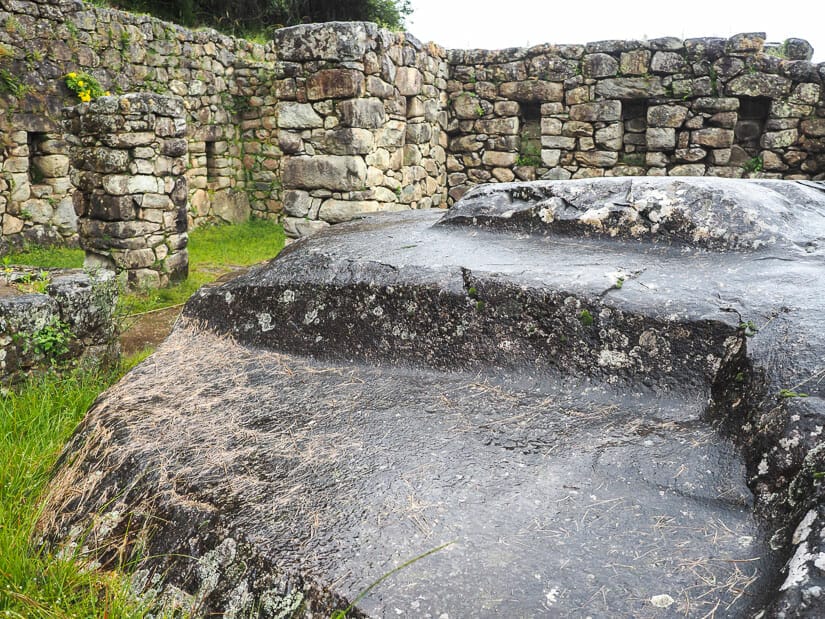
We passed the ruins of a Security Station (see below image). A few minutes later, we passed the immense boulder where some of the best mummies were found.
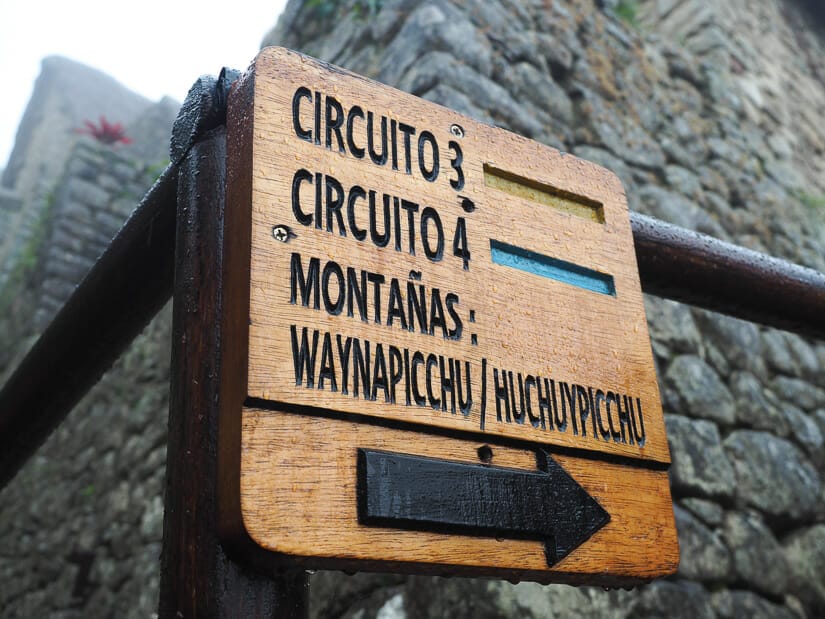
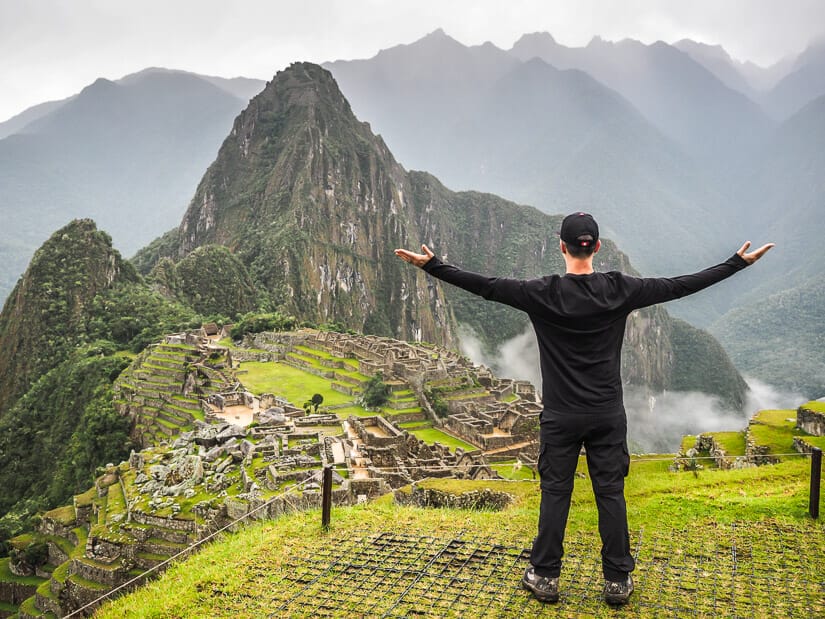
And just like that, we were at Machu Picchu! The terraces at the Guardian House are now divided and roped off into areas, so you are directed to a certain terrace/area depending on what circuit you are on. Since everyone who arrives at Machu Picchu via the 4-day Inca Trail must do Circuit 3, we ended up in that area. You can read my detailed guide to the circuits at Machu Picchu here.
Machu Picchu is commonly obscured by clouds and mist in the early morning, and our visit was no exception. We waited at the viewpoint for a solid 20 minutes, still in the rain, but we never got a full view of the Citadel.
I must admit that I was incredibly disappointed. I had built this moment up in my mind for many years, and it was not at all what I had expected or hoped for. This ended up becoming a life lesson for me about managing expectations.
I didn’t even take a single picture of myself at the famous viewpoint because I was so disappointed. But more importantly, I had another Machu Picchu ticket in my pocket for the next day, so I was willing to take a gamble and hope for better luck the next time (Spoiler: I would get a better view the next day).
From there, we had to exit the Machu Picchu site and re-enter, upon which David took us on our Circuit 3 tour that was included in our tour package.
The Circuits, Additional Tickets, and Leaving
In order to control the heavy crowds at Machu Picchu, there are now 5 set circuits. You must choose and stick to one of them for each ticket that you buy. The circuits are a little fluid in some spots, but strict in others. Moreover, when I visited, I found that some parts of the circuits had been changed and were different than what is indicated on the official site maps of each circuit. Because these circuits are a little complicated and always changing, I’ve written this whole separate guide to choosing the best Machu Picchu Circuit.
For serious visitors, there’s a good chance you will be purchasing more than one Machu Picchu ticket so that you can see more of the site. In fact, I highly recommend it, and I had 3 tickets in total, spread over two days! This is also a good back-up plan in case you have bad weather for one of your days, like we did.
The circuits are a little complicated, and some areas are only open at certain times. Hence, I’ve written this separate guide to the circuits of Machu Picchu (coming soon).
But here is a simple breakdown/summary of the circuits:
- Circuit 1: This is supposed to be a shortened version of Circuit 2, but when I visited, the path that should made it shorter was closed, so Circuit 1 and 2 are now essentially the same thing.
- Circuit 2: This is the best and most complete circuit of Machu Picchu (especially if you add the Inca Bridge hike option, see below). Circuit 2 gives you access to the most places at Machu Picchu. Note that Intihuatana is only open from 7 to 10 AM, so do this circuit early if you want to see it. And at the end of the circuit, you will only be able to see Temple of the Condor (10 AM to 1 PM) or Hall of Mirrors (before 10 or after 1) – it’s impossible to see both on one visit.
- Circuit 3: Only used by those arriving on the Inca trail 4-day hike. It’s a shorter tour that only visits the “lower” areas of the ruins, so it misses some key areas in the upper section like the famous Entrance Gate, Sacred Plaza, Temple of 3 Windows, and Intihuatana. If you want to see those spots like I did, I suggest you buy an additional ticket for the same day (crowded in the afternoon) or even better, first thing the next morning.
- Circuit 4: Only for those who are doing the additional hike to Huayna Picchu or Huchuy Picchu. I highly recommend that you do the Huayna Picchu hike, and do it right after your Machu Picchu Circuit 3 tour. Your trekking company will buy the ticket for your at the appropriate time. This circuit just allows you to get to the hike and back out to the exit, but you can actually see much of the Machu Picchu ruins on the way. Just not the classic MP viewpoint.
- Circuit 5: This is the newest circuit, virtually the same as Circuit 3, except for people who are doing the Inca Trail 2-day or 5-day treks.
To summarize, this is what I did: arrive at Machu Picchu with my group, see the classic view, then take a Circuit 3 tour led by David. Then I parted ways with my group when we reached Sacred Rock (at the far northern end of the site), so I could do my Huayna Picchu hike.
In other words, even though the Huayna Picchu ticket comes with Circuit 4, I didn’t have to leave Machu Picchu and re-enter to use it. The rest of my group finished their tour with David, went to Aguas Calientes and had lunch with him, then caught their train back to Ollantaytambo and van to Cusco.
After I did the Huayna Picchu hike, Machu Picchu was totally packed in the early afternoon, and I was completely exhausted. So I happily left the site, with the bus ticket included in my tour, and spend a night in Aguas Calientes. The next morning, I returned to Machu Picchu on my own by bus, which I paid for.
Because I wanted to see every possible thing I could at Machu Picchu, I bought what I believe to be the best and most complete ticket: Puente Inka + Circuit 2. This one includes Circuit 2 (the best one) AND an additional side hike to the Inca Bridge, which starts and ends at the Guardian House. Here’s my guide to visiting the Inka Bridge.
If you choose the earliest ticket (7 AM), you can enter Machu Picchu from 6 to 7 AM, proceed to the famous viewpoint to take your classic Machu Picchu pictures (this time I actually got pictures without clouds!) Then you can do the Inca Bridge hike anytime from 7 to 8 AM.
After my second day of touring Machu Picchu, I felt like I had done the site justice. I then stayed a second night in Aguas Calientes, because there were several other things I wanted to see around there. These included some hikes to waterfalls, a hot spring, and an impressive butterfly garden. Oh, and one of the best showers of my life!
After my second night in Aguas Calientes, I caught my train to Ollantaytambo (make sure to arrange the train time you need with your trekking company).
Sam Travel also provided my transportation from Ollantaytambo to Cusco, even though I came back two days later than my group.
And that’s it, folks. One of the most highly anticipated, but different than I expected experiences of my life summarized! If you have any questions about the Inca Trail 4-day trek or anything I’ve covered above, please comment below!


since you mentioned “awkward moments” re tipping, may I ask what was the tip for the trek per perso?
The company asked us to each contribute 300 soles for all the porters and chefs (there were 18 of them for our group of 8). Then we as a group decided to each give 70 soles to the guide, though I gave a little more (100).
How strenuous would you say the hike was? We are going in September and have an average level of fitness but nervous given the elevation.
I would say I have average level fitness too. Probably even a little lower than average, but I did training for a few months before the trip and I think that helped a lot. As for elevation, it seems to really affect different people differently. Some have no issue at all, and some struggle with it even many days into their trip. I know from past experience that I am sensitive to altitude, so I acclimatized in the Sacred Valley for over a week before I did the hike. When I first arrived in Pisac (lower than Cusco), and despite taking Diamox, I felt like crap for the first two days. But then I did several smaller and then bigger hikes in the Sacred Valley before the Inca Trail, so that really helped me to build up to it too. Only the second day of the Inca trail is quite intense. It’s just a really long day, starting with several hours of uphill, a few steeply downhill, and then (depending on your trekking company’s route) more hours of uphill. It was a slog for sure, but you just keep going and you’ll make it. You just want to make sure to give yourself some days and practice hikes in the area to get ready for it, and be in good enough shape that your legs and knees will handle the long day with lots of up and downhill.